Your Bottle Warmer is Gross: How to Descale It in 5 Minutes
Hey there, amazing new parent. You’re in the thick of it, aren’t you? The late-night feedings, the endless diaper changes, the overwhelming love you feel for that tiny human. In this beautiful chaos, you’ve come to rely on a few trusty sidekicks, and one of the biggest heroes is likely your bottle warmer. It’s the magical device that delivers a perfectly warm bottle to a hungry, crying baby in minutes. It’s a lifesaver.
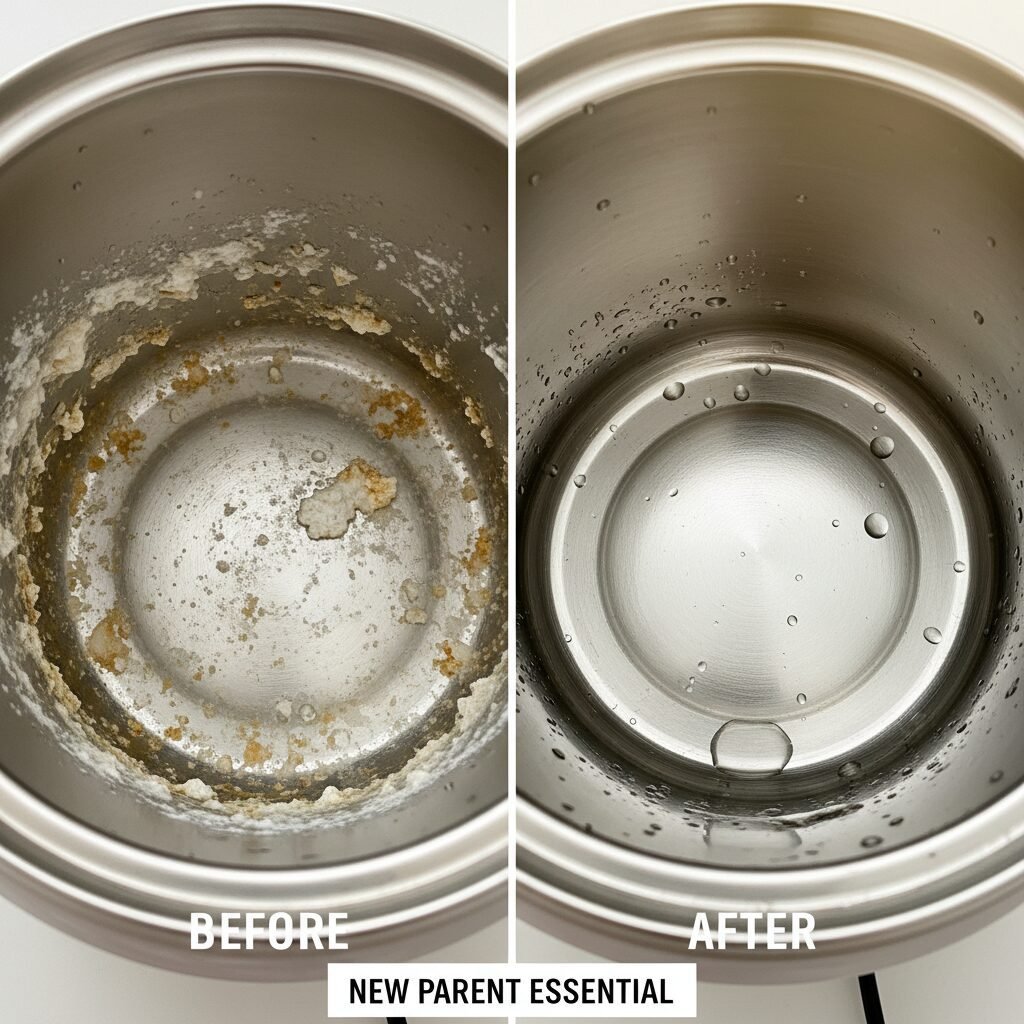
But can I let you in on a little secret? Your trusty sidekick might be hiding a dirty one. Have you ever actually looked inside the water chamber? If you’re seeing a chalky, white, or even brownish film coating the bottom, you’re not alone. That, my friend, is limescale, and it’s a sign that your bottle warmer is due for a deep clean. It’s one of those little tasks that nobody tells you about in the baby books, but it’s incredibly important. That buildup isn’t just unsightly; it can affect how well your warmer works and, more importantly, create a less-than-hygienic environment for preparing your baby’s food. The good news? Getting rid of it is ridiculously fast and easy. Seriously. Forget scrubbing for hours. We’re going to get this done in about five minutes flat. Let’s get that warmer from gross to gleaming so you can get back to the important stuff, like snuggling your little one.
Why That Gunky Buildup Happens (And Why You Should Care)
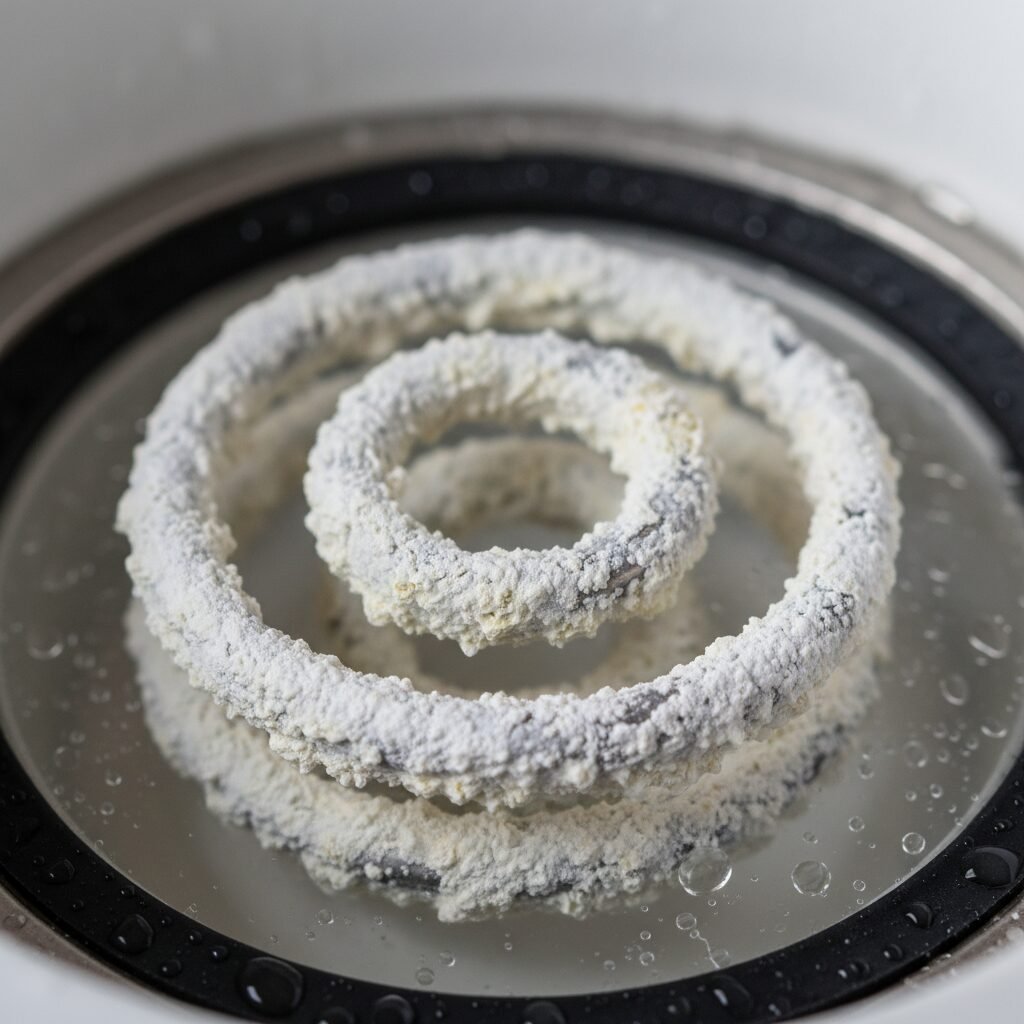
Okay, let’s talk about that gunk. What is it, really? That crusty layer at the bottom of your bottle warmer is a collection of mineral deposits, primarily calcium carbonate, also known as limescale. If you live in an area with ‘hard water,’ it means your tap water has a high concentration of dissolved minerals like calcium and magnesium. When you heat this water in your bottle warmer, the water evaporates, but the minerals get left behind. Over time, they build up, creating that hard, chalky scale.
So, why is this a big deal? It’s not just about looks. There are two main reasons to be concerned about limescale in your baby’s bottle warmer:
1. It’s an Efficiency Killer
The heating element in your warmer is designed to transfer heat directly to the water, which then warms the bottle. Limescale acts like a thick, insulating blanket over that heating element. This forces the warmer to work much harder and longer to heat the same amount of water. You might notice that it’s taking longer to warm up bottles, or worse, the temperature is inconsistent. One bottle might be lukewarm while the next is too hot. For a tired parent at 3 AM with a screaming baby, that inconsistency is the last thing you need. A clean warmer is an efficient warmer.
2. It Can Be a Germ Hotel
This is the big one. The warm, moist environment of a bottle warmer is the perfect breeding ground for bacteria, mold, and other unwanted microorganisms. While the limescale itself isn’t alive, its porous, uneven surface creates countless tiny nooks and crannies where germs can hide and multiply, safe from a quick rinse. Since this is a device used to prepare your baby’s food, maintaining a hygienic environment is non-negotiable. A regular descaling doesn’t just remove the mineral buildup; it sanitizes the surface and eliminates potential hiding spots for germs, ensuring every bottle you warm is safe for your precious little one. Think of it as a crucial part of your kitchen hygiene routine, right up there with washing bottles and pacifiers.
Gather Your Supplies: What You’ll Need for a Squeaky Clean Warmer
Ready to tackle this? I promise, the prep is almost nonexistent. You don’t need any fancy, expensive, or harsh chemical cleaners. In fact, the best tool for the job is probably sitting in your pantry right now. Simplicity is key when it comes to baby gear, and this is no exception.
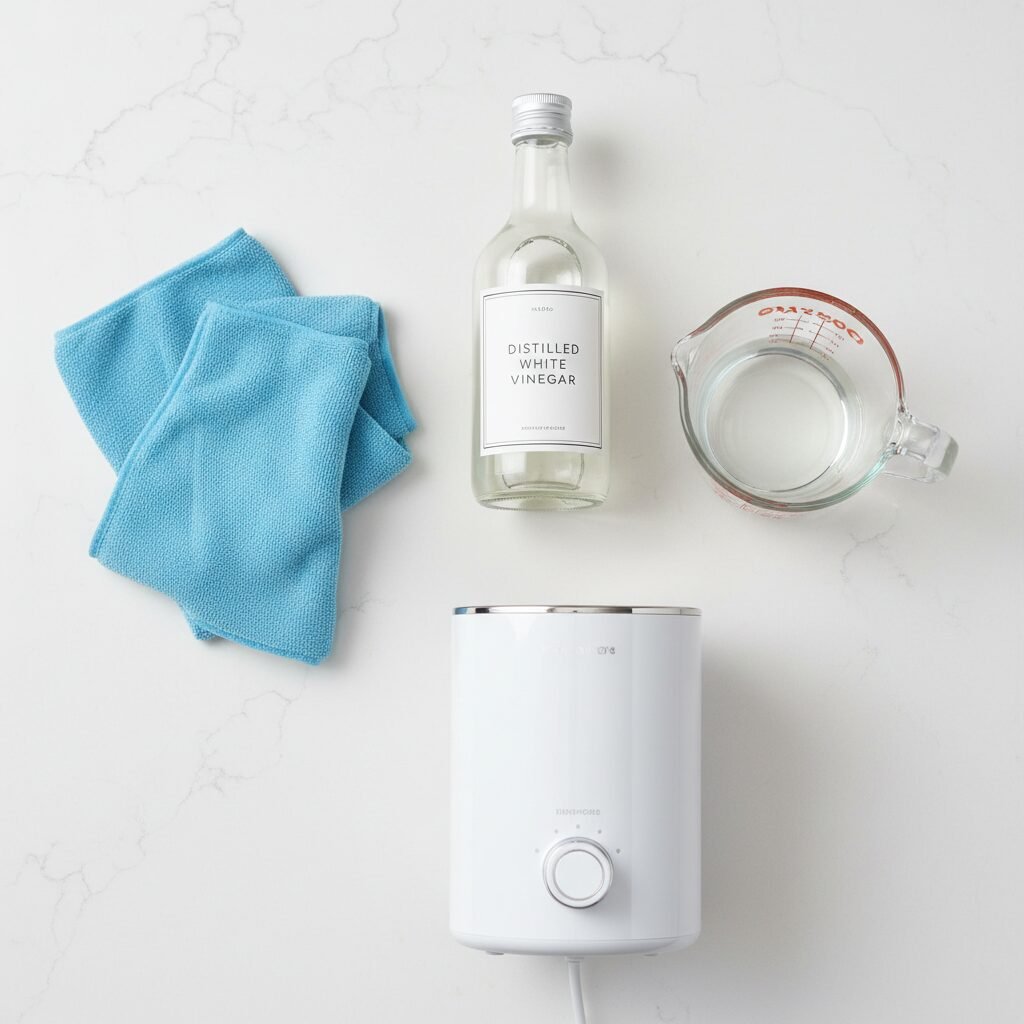
Here’s your super-short shopping list (or rather, ‘pantry-grabbing list’):
- Distilled White Vinegar: This is our magic ingredient. The acetic acid in vinegar is fantastic at breaking down and dissolving mineral deposits like limescale. It’s food-safe, inexpensive, and incredibly effective.
- Water: To dilute the vinegar. Using distilled water for this process (and for regular use in your warmer!) can help prevent future buildup, but regular tap water will work just fine for the cleaning itself.
- A Soft Cloth or Sponge: You’ll need this for a final wipe-down. Make sure it’s a non-abrasive one to avoid scratching the inside of your warmer. A microfiber cloth is perfect.
- Optional – A Small Bottle Brush: If your warmer has some tight corners or tricky crevices, a small brush (like one from your bottle cleaning set) can be helpful for getting into those spots after the vinegar has done its work.
That’s it! See? I told you it was simple. We’re avoiding harsh chemicals because anything you use to clean the warmer could potentially leave a residue. Vinegar is powerful enough to get the job done but rinses away cleanly, leaving you with nothing but a sparkling, safe appliance for your baby’s bottles.
A Quick Note on Safety: Always work in a well-ventilated area. While vinegar is safe, it can have a strong smell. And never, ever mix vinegar with bleach, as it creates toxic chlorine gas. For this task, vinegar and water are all you need.
The 5-Minute Descaling Method: Step-by-Step Instructions
Alright, let’s get this done. Put on your favorite song, and you’ll probably be finished before it’s over. Here is the simple, step-by-step process to get your bottle warmer looking and working like new.
- Unplug and Cool Down: Safety first! Always, always, always unplug the bottle warmer from the wall outlet before you start cleaning. If you’ve used it recently, give it 10-15 minutes to cool down completely.
- Empty and Prep: Pour out any old water that’s sitting in the reservoir. Give it a quick rinse with fresh water to remove any loose debris.
- Mix Your Magic Solution: Create your descaling solution. A 50/50 mixture works perfectly. For most warmers, this means using about 1/4 cup of distilled white vinegar and 1/4 cup of water. You just need enough to cover the heating element and the worst of the buildup on the bottom.
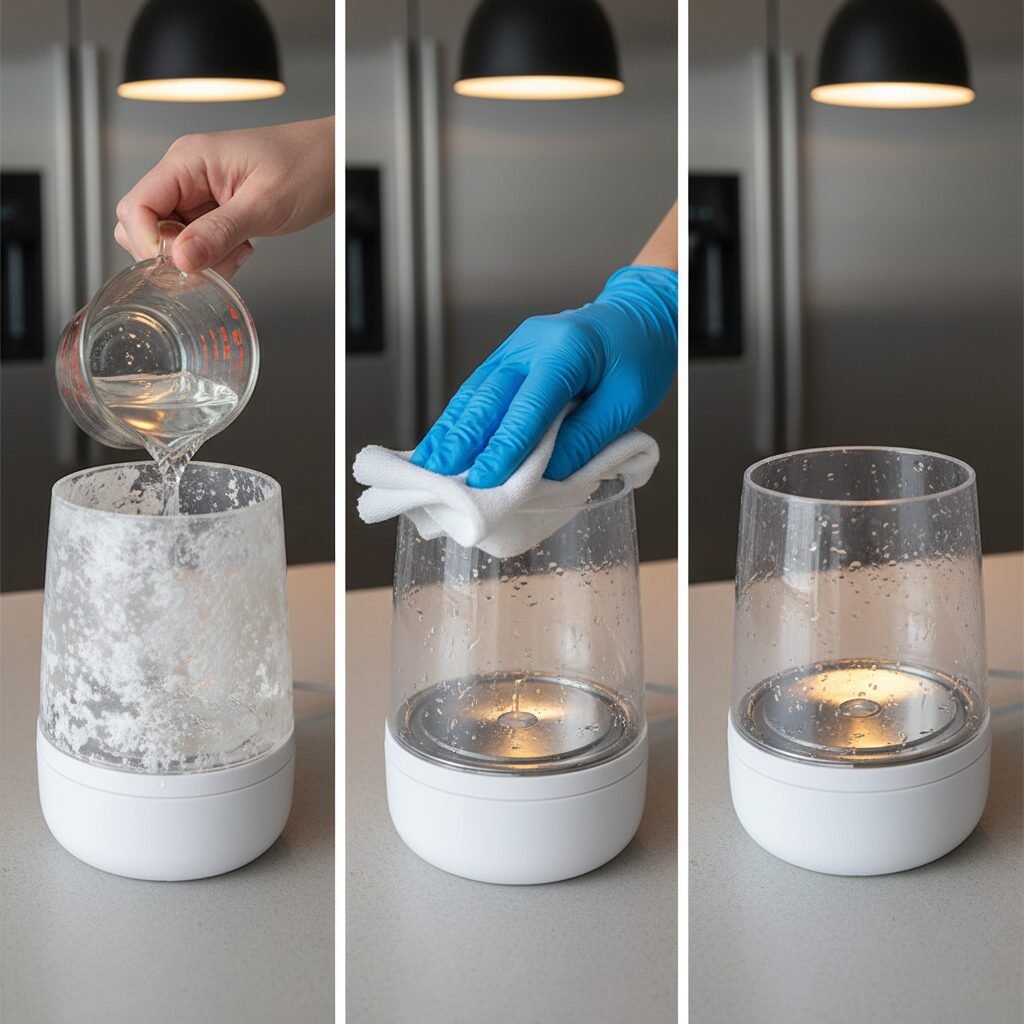
- Pour and Wait: Pour the vinegar and water solution directly into the warmer’s water chamber. Now, let it sit. This is where the magic happens. The acid in the vinegar will start to break down the mineral deposits. You might even see it fizzing a little—that’s a good sign! Let it soak for at least 10-15 minutes. For really stubborn buildup, you can let it sit for up to 30 minutes.
- Optional – Run a Cycle: Some manufacturers recommend running a heating cycle with the vinegar solution inside.
IMPORTANT: Check your specific bottle warmer’s manual before doing this! If it’s approved, this can speed up the process. If not, just letting it soak is perfectly effective.
- Empty and Wipe: Pour the vinegar solution down the drain. You’ll be amazed at how much of the limescale just pours out with it. Use your soft cloth or sponge to gently wipe the inside of the chamber. The remaining scale should come off easily. Use a small bottle brush for any stubborn spots in the corners.
- Rinse, Rinse, Rinse!: This step is crucial for getting rid of the vinegar smell and residue. Fill the chamber with clean, plain water and swish it around, then pour it out. Repeat this process two or three times.
- The Final ‘Dummy’ Cycle: To be absolutely sure all the vinegar is gone, fill the warmer with fresh water (to its normal fill line) and run one full heating cycle with no bottle in it. This will steam clean the interior and flush out any lingering vinegar odor. Pour this water out.
- Dry Thoroughly: Wipe the inside and outside of the warmer with a clean, dry cloth. Let it air dry completely before plugging it back in and using it.
And… you’re done! A perfectly clean, efficient, and hygienic bottle warmer, ready for its next important job.
Keeping It Clean: How Often Should You Descale?
Congratulations, you’ve mastered the art of descaling! Now, the big question is, how do you keep it from turning into a science experiment again? The key is regular, preventative maintenance. It sounds like a chore, but when it only takes five minutes, it’s one of the easiest things to add to your routine.
Think of it like this: you wouldn’t go a month without washing your coffee pot, and this is even more important. A consistent cleaning schedule prevents heavy buildup, which means each cleaning session will be even quicker and easier than the last.
Your New Descaling Schedule
Here’s a simple guideline you can follow:
| Water Type | Recommended Descaling Frequency | Why? |
|---|---|---|
| Soft Water / Using Distilled Water | Once every 4 weeks | Mineral content is low, so buildup is slow. A monthly clean is perfect for maintenance and sanitization. |
| Hard Water (Most Tap Water) | Once every 2-3 weeks | Higher mineral content means limescale builds up much faster. More frequent cleaning is needed to keep the warmer efficient and hygienic. |
| Very Hard Water | Once every 1-2 weeks | If you notice a visible film forming after just a week, you have very hard water. A quick weekly or bi-weekly descale is best. |
Pro Tips for a Cleaner Warmer
Want to make your life even easier? Here are a couple of hacks to minimize buildup between cleanings:
- Use Distilled Water: This is the number one tip. Distilled water has had all its minerals removed. If you use it exclusively in your bottle warmer, you will have virtually no limescale buildup. A gallon jug is inexpensive and will last a very long time. You’ll still want to do a vinegar rinse monthly for sanitization, but you won’t have to battle that crusty scale.
- Don’t Let Water Sit: Try to get in the habit of emptying the water reservoir after the last bottle of the day. Letting water sit in the warmer for long periods can encourage both mineral deposits and bacterial growth. A quick empty-and-dry takes only a few seconds.
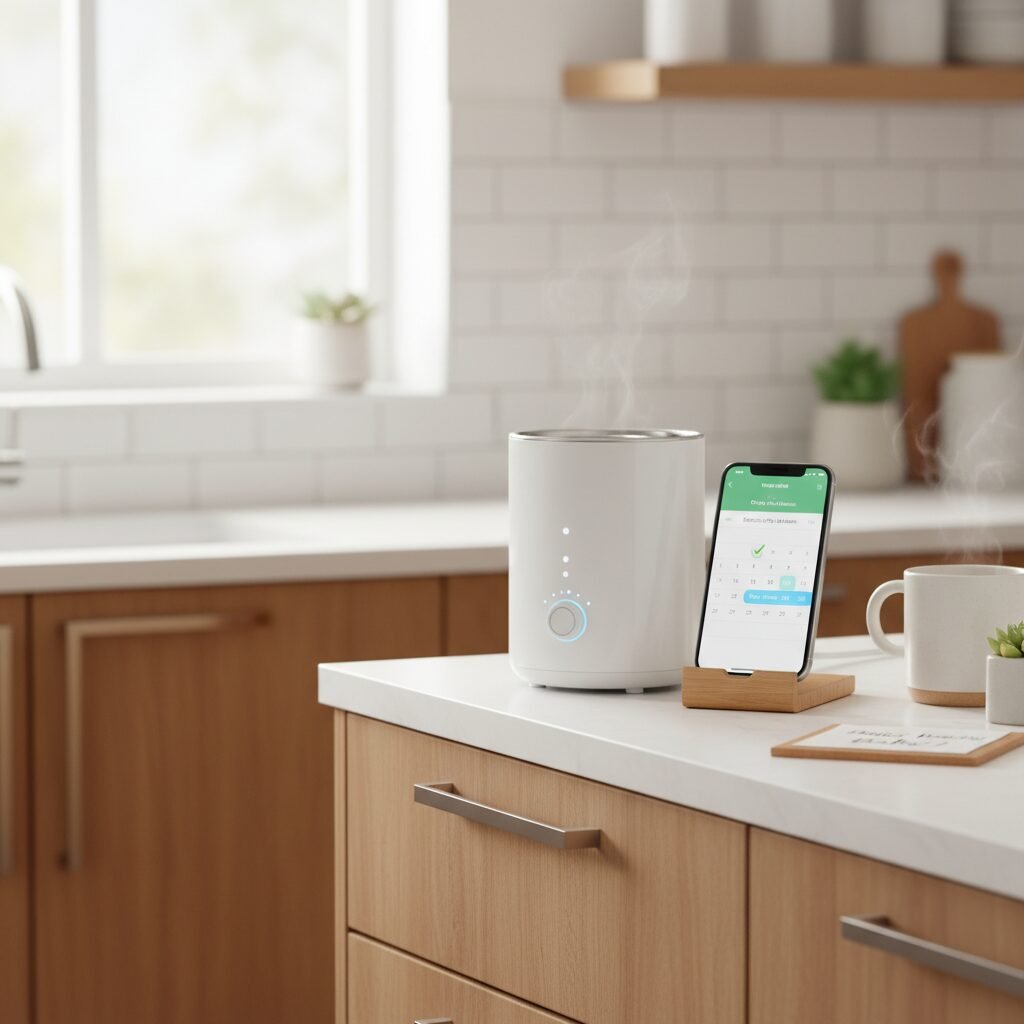
By setting a recurring reminder on your phone or marking it on your calendar, this little five-minute task will become a simple, thoughtless part of your routine, ensuring your baby’s warmer is always safe and ready to go.
Common Questions & Troubleshooting (Because We’ve Been There!)

It’s totally normal to have a few questions when you’re trying something new, especially when it involves baby gear. We’ve compiled some of the most common questions we hear from parents about cleaning their bottle warmers. Chances are, if you’re thinking it, someone else is too!
Can I use something other than vinegar? I can’t stand the smell!
Yes, you can! While vinegar is our top choice for being cheap, effective, and non-toxic, there are alternatives. You can use lemon juice (the citric acid works similarly to vinegar’s acetic acid) or a dedicated commercial descaling solution formulated for baby products or coffee makers. Just be sure to read the instructions carefully and rinse, rinse, rinse to make sure no residue is left behind.
What if the gunk is really stubborn and won’t come off?
If you’re dealing with a really thick layer of limescale, you may need a little more power. First, try letting the vinegar solution soak for longer—an hour or even two won’t hurt the appliance. If that doesn’t work, after soaking, use a soft bottle brush to give it a gentle scrub. The vinegar should have softened the deposits enough that they’ll break away with a little friction. Avoid using anything abrasive like a scouring pad, as it can damage the heating element.
My warmer still smells like a salad. What do I do?
The vinegar smell can be persistent, but it will go away! The key is the ‘dummy’ cycle we mentioned in the instructions. Running a full heating cycle with only plain, fresh water and then letting it air dry completely is usually enough to eliminate the odor. If it’s still lingering, you can run a second plain water cycle. The smell will dissipate, I promise!
Does this cleaning method work for all bottle warmers?
The vinegar and water method is a safe and effective cleaning solution for the vast majority of standard bottle warmers on the market. However, every appliance is slightly different. Some ‘smart’ warmers or travel models might have specific instructions.
Your product manual is your best friend. Always take a quick glance at the manufacturer’s cleaning recommendations before you begin. They know their product best, and following their guide is the surest way to protect your warranty and your warmer.
Conclusion
See? That wasn’t so bad! In less time than it takes for your baby to finish a nap, you’ve transformed that gunky bottle warmer into a clean, safe, and efficient machine. It’s one of those small victories that feels huge in the world of parenting. By adding this quick task to your monthly routine, you’re not just cleaning an appliance; you’re creating a healthier environment for your baby and giving yourself valuable peace of mind. You’re ensuring that every bottle is warmed perfectly and safely, every single time.
You’re doing an incredible job navigating this journey. Juggling all the new responsibilities is a monumental task, and taking a moment to care for the tools that help you is a testament to how dedicated you are. So give yourself a pat on the back. You’ve got this. Now, go enjoy a well-deserved snuggle with your little one, knowing your trusty bottle warmer is ready and waiting for the next call of duty.