Cooking With a Newborn: Safe Ways To Baby Wear While Prepping Dinner
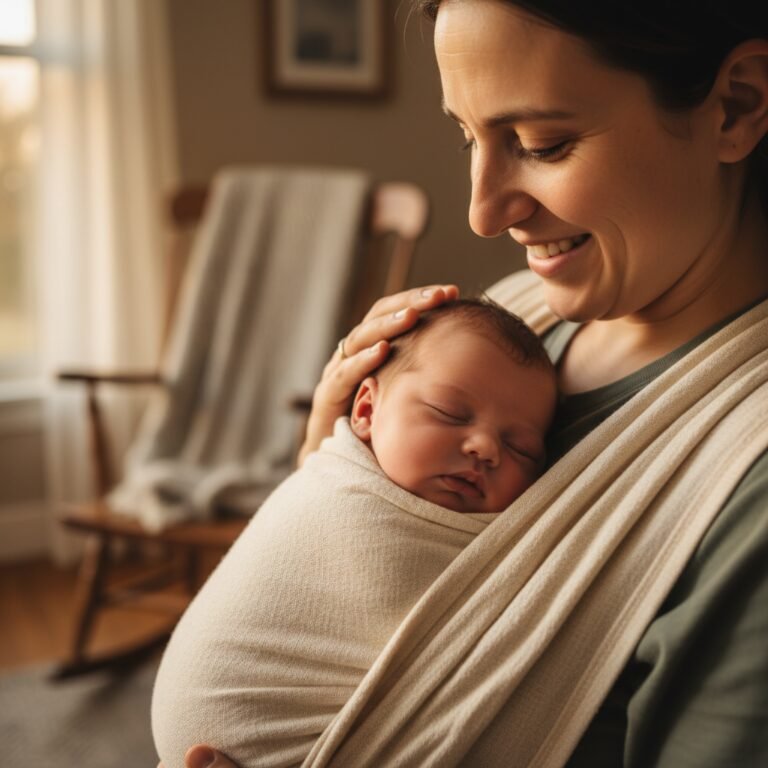
Hey there, new parent. I see you. It’s 5 p.m., your precious little one has decided this is the perfect time to practice their opera-singer lungs, and your stomach is rumbling. The thought of making a real meal feels like climbing a mountain. For years, I’ve worked with parents in your exact shoes, and I always tell them the same thing: you can have your baby close and make dinner. The secret? Babywearing.
Wearing your baby is an incredible tool. It soothes them, promotes bonding, and gives you two free hands. But when you add in a kitchen environment—with its heat, sharp objects, and potential for spills—safety becomes our number one priority. It’s completely normal to feel a little nervous about it!
So, let’s take a deep breath together. As a pediatric nurse and lactation consultant, my goal is to empower you with the knowledge to do this safely and confidently. This isn’t about being a superhero parent; it’s about finding practical ways to care for your baby and yourself. In this guide, we’ll walk through everything you need to know to turn meal prep from a source of stress into a peaceful, productive, and snuggly part of your day.
The Golden Rules of Kitchen Babywearing: Your Safety-First Checklist
The Golden Rules of Kitchen Babywearing: Your Safety-First Checklist
Before you even think about chopping a single carrot, we need to talk about the fundamentals of safe babywearing. Getting this right is non-negotiable, especially in a higher-risk environment like the kitchen. The good news is that the core principles are simple and easy to remember. We use a handy acronym in the newborn care world: T.I.C.K.S. Let’s break it down.
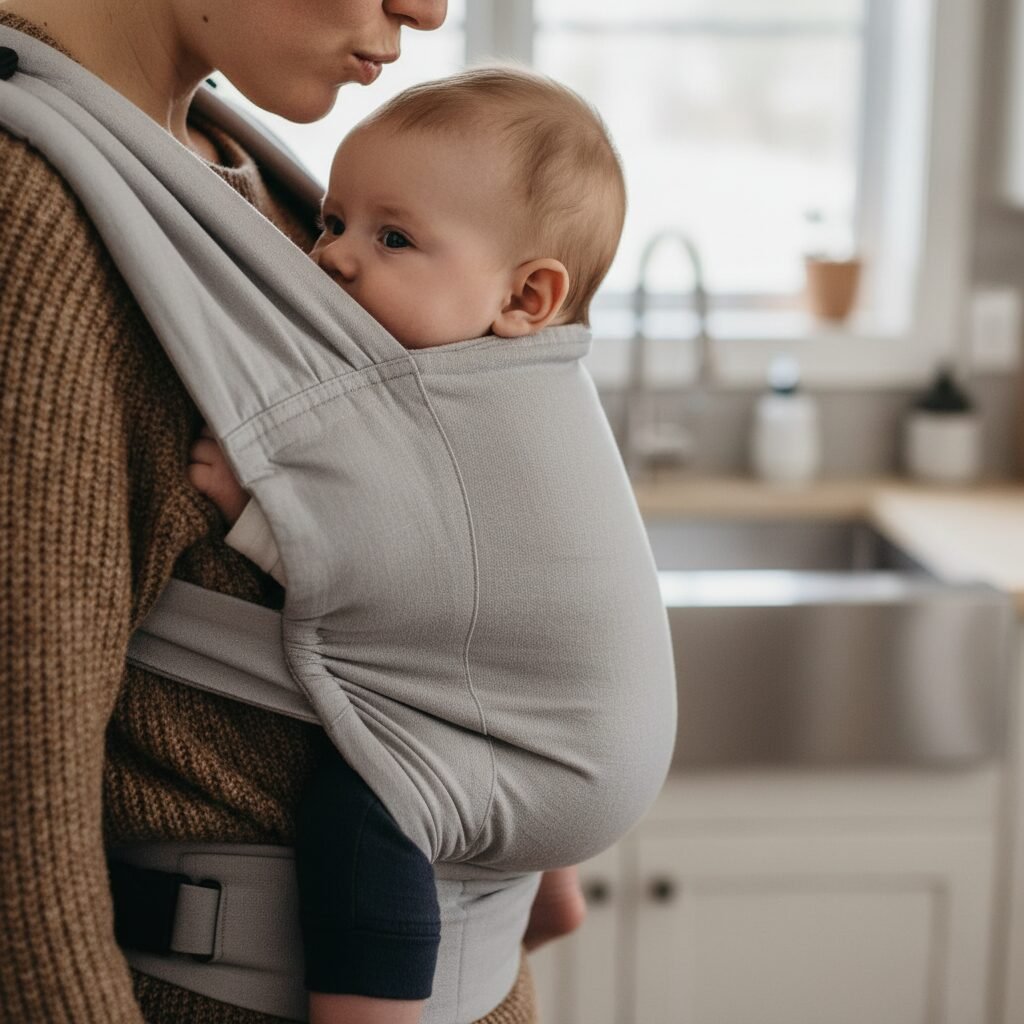
- T – Tight: The carrier should be tight enough to hug your baby close to you. Any slack can cause your baby to slump, which can hinder their breathing and pull on your back. It should feel snug and secure for both of you.
- I – In view at all times: You should always be able to see your baby’s face by simply glancing down. The fabric of the carrier shouldn’t close over their head or face. This is crucial for monitoring their breathing.
- C – Close enough to kiss: Your baby should be positioned as high on your chest as is comfortable. By tipping your head forward, you should be able to easily kiss your baby on the top of their head.
- K – Keep chin off chest: A baby’s chin being forced onto their chest can restrict their airway. Ensure there’s always a space of at least a finger’s width between their chin and their chest. This is the most critical part of the checklist.
- S – Supported back: In an upright carrier, your baby’s back should be supported in its natural, slightly curved position. When you press gently on their back, they shouldn’t uncurl or move closer to you.
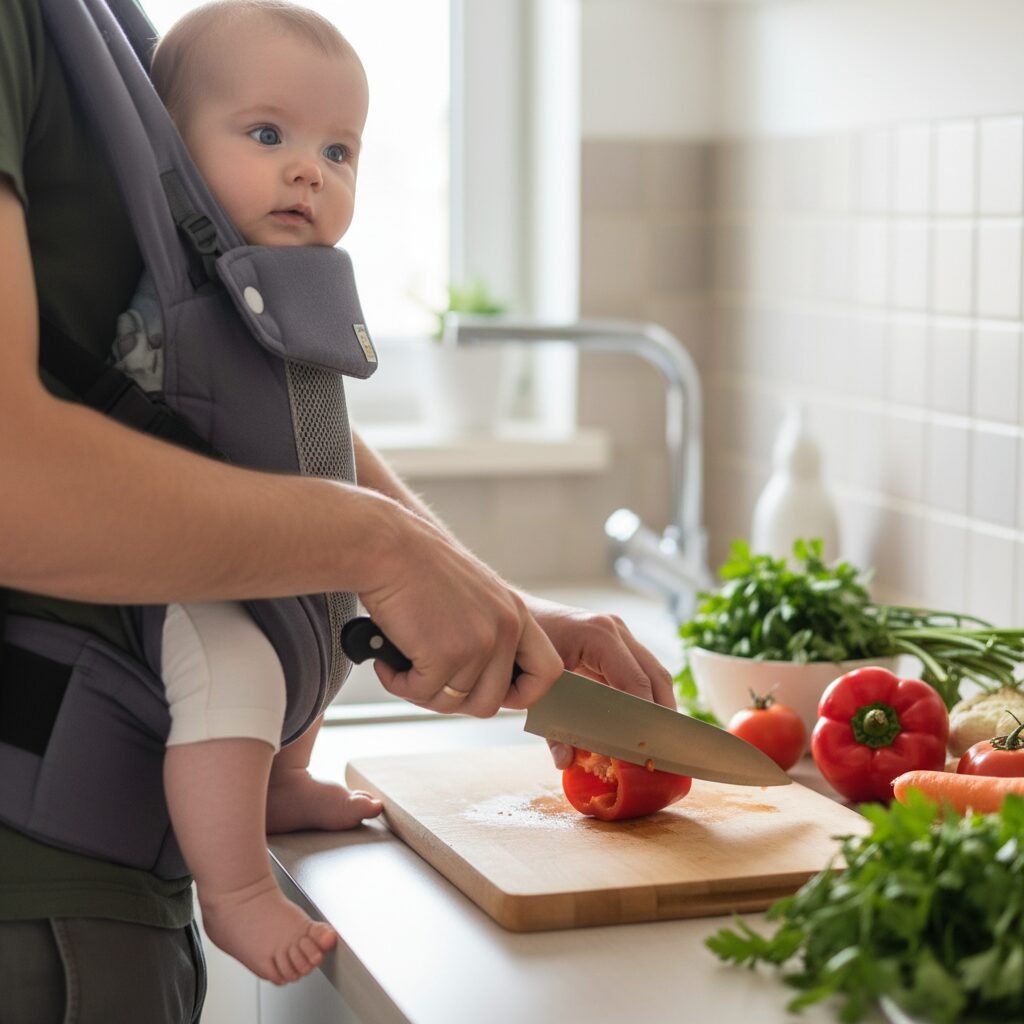
A Nurse’s Safety Warning: The biggest risks in the kitchen are burns from hot splatters, steam, or accidentally touching a hot surface. Always maintain a significant distance—think at least an arm’s length plus some—from the stove, oven, and hot appliances like toasters or kettles. Your baby’s delicate skin is far more sensitive than yours.
Choosing the Right Carrier for the Kitchen
Not all carriers are created equal when it comes to kitchen tasks. You want something secure, comfortable, and easy to clean. While long, trailing wraps can be beautiful, they can also be a hazard around heat or moving feet. Here’s a quick comparison:
| Carrier Type | Kitchen Pros | Kitchen Cons |
|---|---|---|
| Soft-Structured Carrier (SSC) | Easy and quick to put on; very secure with buckles; no long, dangling fabric. | Can be bulkier; may not provide a snug fit for the tiniest newborns. |
| Stretchy Wrap | Very snug and cozy for newborns; conforms to baby’s body perfectly. | Can have long tails of fabric that are a tripping/snagging hazard; can be hot. |
| Ring Sling | Quick to pop baby in and out; good for hip carrying older babies who want to see. | Requires more practice to get a secure fit; uneven weight distribution on one shoulder. |
| Woven Wrap | Extremely versatile for different carries (front, hip, back). | Requires a lot of practice; long fabric can be a significant hazard in the kitchen. |
For new parents, I often recommend a soft-structured carrier (SSC) for kitchen use once your baby fits securely. The lack of dangling fabric and the secure, buckled fit provide peace of mind. Whatever you choose, make sure you are 100% confident in using it before you start multitasking.
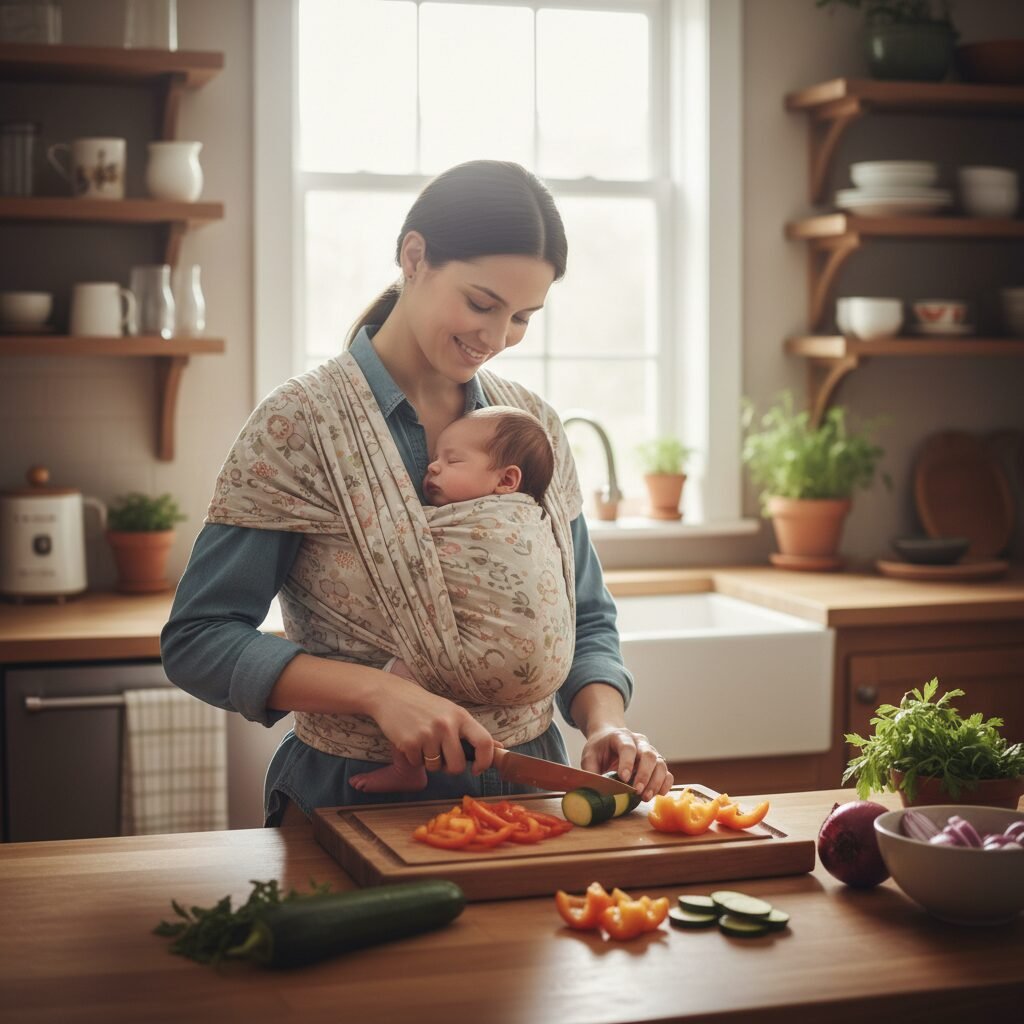
Creating Your Safe Cooking Zone: Prepping for Success
Creating Your Safe Cooking Zone: Prepping for Success
Success in the kitchen with a baby on your chest is 90% preparation. You want to create a safe, contained, and efficient workspace before you even pick up your little one. Think of it like a chef’s mise en place, but with an added layer of baby safety. This minimizes movement, reduces risk, and keeps you calm and focused.
Your Pre-Flight Checklist
Before you strap your baby on, run through these steps:
- Gather All Ingredients: Pull everything out of the fridge and pantry that you’ll need. Place it all on the counter in your designated safe zone. This prevents you from having to bend down or reach far with a baby attached.
- Get Your Tools Ready: Lay out your cutting board, knives, mixing bowls, and utensils. Make sure everything is within easy reach of your primary workspace.
- Clear the Decks: Remove all clutter from your safe zone counter. You want a clean, clear surface to work on. Also, do a quick sweep of the floor to remove any tripping hazards like pet toys or shoes.
- Designate a “No-Go Zone”: The area around your stove, oven, and microwave is now off-limits while you’re wearing the baby. Mentally (or even physically, with a small mat) draw a line you won’t cross. All ‘hot work’ must be done when the baby is safely elsewhere.
Safe Tasks vs. Tasks to Avoid
Let’s be crystal clear: you cannot do everything while babywearing. The goal is to prep, not to cook a five-course meal from start to finish. Your focus should be on tasks that are stationary and low-risk.
| Safe Tasks (Green Light) | Tasks to Avoid (Red Light) |
|---|---|
| Washing vegetables in the sink | Frying, sautéing, or boiling on the stovetop |
| Peeling and chopping fruits and vegetables at a counter | Opening a hot oven door (blast of hot air) |
| Measuring ingredients | Using a blender, food processor, or stand mixer |
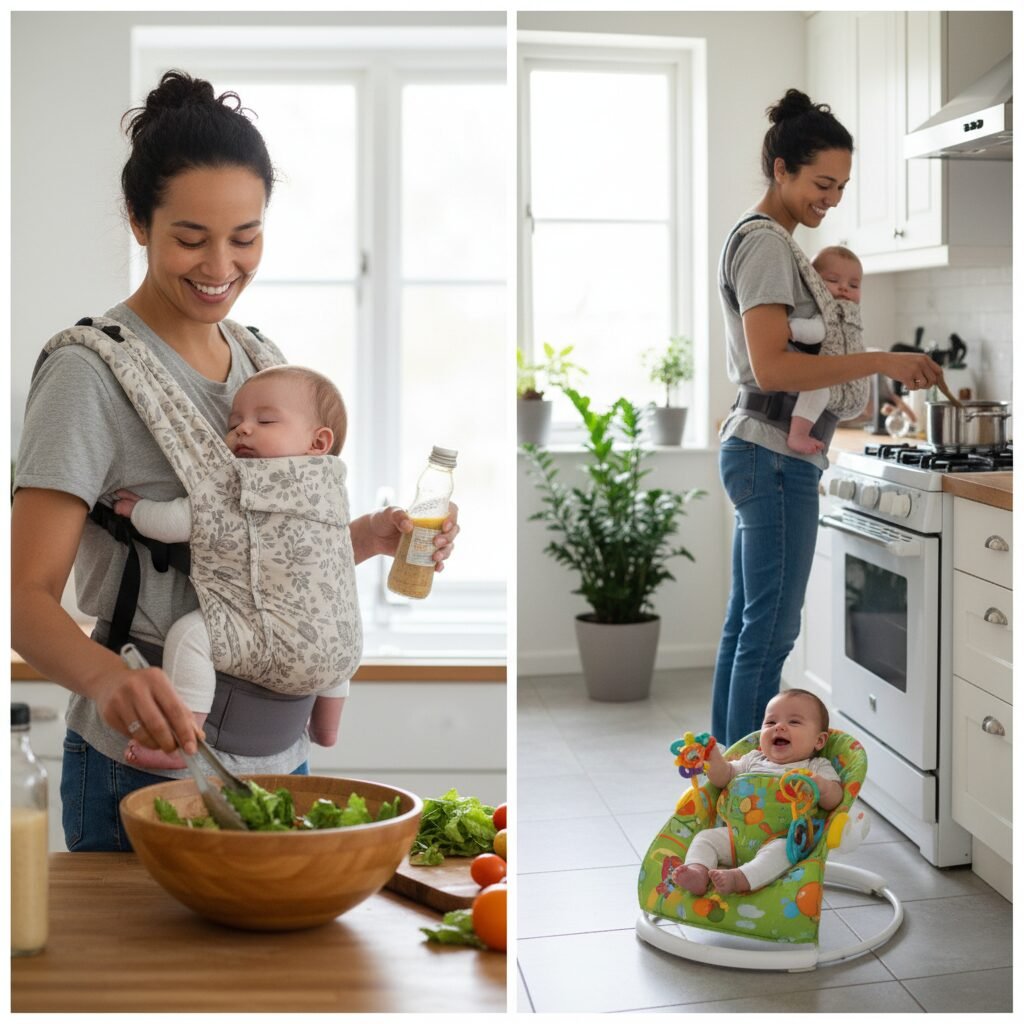
| Mixing ingredients in a bowl (e.g., making a salad, stirring batter) | Handling raw meat (risk of cross-contamination) |
| Assembling sandwiches or wraps | Carrying hot or heavy pots |
| Kneading dough on a counter | Anything involving open flames or hot oil |
Think of babywearing time as your ‘prep chef’ time. You can get all the components of a meal ready so that when your partner gets home, or when you have a moment to put the baby down safely, the actual ‘hot’ cooking part takes only a few minutes.
Your Step-by-Step Guide: From Snuggling In to Slicing Veggies
Your Step-by-Step Guide: From Snuggling In to Slicing Veggies
Alright, your kitchen is prepped and your safety mindset is on. Now for the main event! It might feel awkward at first, but with a little practice, this will become a smooth and natural routine. Let’s walk through it step by step.
- Step 1: Secure Your Co-Pilot. In a different room, like the living room, get your baby settled and secure in the carrier. Go through your T.I.C.K.S. checklist one more time. Use a mirror if you need to! Make sure you both feel comfortable and supported before you even head toward the kitchen.
- Step 2: Enter the Safe Zone. Walk into the kitchen and plant your feet firmly in your designated safe zone. Take a moment to get your balance and feel centered. Remember, you’re a little wider and more front-heavy than usual.
- Step 3: Master Your Moves. Your body mechanics are key. If you need to pick something up that you dropped (it happens!), always bend at the knees in a squat, keeping your back straight. This protects your back and keeps the baby stable and upright. Avoid bending at the waist, which can cause the baby to dangle or slump forward.
- Step 4: Handle Tools with Care. When using a knife, be extra mindful of where your baby’s adorable little feet and hands are. Keep the knife on the far side of the cutting board from your body. Work slowly and deliberately. This isn’t the time for speed-chopping! Place any sharp tools back in a safe spot immediately after using them.
- Step 5: Listen to Your Baby (and Your Body). Is your baby starting to fuss? Try gently rocking or swaying as you work. Sometimes the rhythmic motion of chopping is enough to soothe them. If they get truly upset, it’s okay to stop. This isn’t a race. Take a break, walk around, and meet their needs. Cooking can wait five minutes. The same goes for you—if your back starts to ache, it’s a sign to take a break and rest.
Remember, the goal is connection and function, not perfection. If all you manage to do is chop one onion before the baby needs you, that’s one more onion than you had chopped before. Celebrate the small wins!
Beyond the Basics: Pro-Tips and When to Use Plan B
Beyond the Basics: Pro-Tips and When to Use Plan B
You’ve mastered the basics, and you’re starting to feel more confident. That’s fantastic! Now let’s cover a few pro-tips that can make the experience even smoother, and, just as importantly, discuss what to do when babywearing just isn’t the right answer for the moment.
Level-Up Your Kitchen Babywearing Game
- Wear an Apron Over the Carrier: This is my favorite tip! An apron protects your carrier from spills and splatters, which means less laundry for you. It’s a simple trick that makes a huge difference.
- Practice with a Stand-In: If you’re nervous, practice your kitchen movements while wearing the carrier with a stuffed animal or a bag of flour inside. It helps you get used to the bulk and motion without any risk.
- Use a Mirror: Keep a small mirror handy in the kitchen. A quick glance can help you check on the baby’s positioning and give you peace of mind without having to stop what you’re doing.
- Consider Back-Carrying (For Older Babies): Once your baby has excellent head and neck control and you are an experienced babywearer, you might consider a back carry. This keeps them completely out of the way of your workspace. However, you lose that ‘in view at all times’ advantage, so this is only for confident wearers with older infants, and still only for safe, cold prep tasks.
Knowing When to Switch to Plan B
Friend, there will be days when babywearing in the kitchen doesn’t work. And that is 100% okay. The goal is a fed family and a safe baby, not a rigid adherence to one method. Here are some alternatives:
- The Safe Container: Place a bouncer, swing, or play mat on the kitchen floor, but make sure it’s far away from your work area and any potential hazards. You can chat and sing to your baby while you work, keeping them engaged and happy.
- Tag-Team with a Partner: If another adult is home, use them! One person can hold and entertain the baby while the other handles the cooking. This is often the easiest and safest solution.
- Embrace Low-Cook or No-Cook Meals: Some days call for a rotisserie chicken, a big salad, or sandwiches. Giving yourself permission to have an ultra-simple meal is a form of self-care. It’s not a failure; it’s a smart strategy for a tiring season of life.
- Prep During Naps: This is the classic advice for a reason. If your baby takes even a 20-minute nap, use that time for the most critical cooking tasks, like using the stove.
Ultimately, flexibility is your greatest tool as a new parent. Listen to your baby’s cues and your own intuition. You’ll find a rhythm that works for your family.
Conclusion
Look at you! You’ve just learned how to navigate the kitchen with your little one safely snuggled against you. By focusing on the core principles—a secure carry with T.I.C.K.S., a well-prepped Safe Zone, and sticking to Safe Tasks—you can transform a potentially stressful time of day into a wonderful opportunity for connection.
Please, be patient with yourself. There will be a learning curve. Some days will be a symphony of chopping and cooing, and others might end with takeout on the menu, and both are perfectly fine. The most important thing is that you and your baby are safe and you’re finding ways to make this beautiful, chaotic new life work for you.
You are doing an amazing job. Now go enjoy that meal you made, you deserve it. You’ve not only nourished yourself, but you’ve also filled your baby’s cup with closeness and security. And that’s the most important recipe of all.