Save $500 a Year With This 3-Ingredient DIY Natural Baby Wipe Recipe
Hey there, new parent! Welcome to the club. It’s a wild, wonderful ride filled with tiny socks, endless cuddles, and… a surprising number of expenses. Between diapers, formula, and all the adorable outfits, the costs can add up faster than you can say ‘sleep regression.’ One of the biggest recurring expenses? Baby wipes. You go through them for everything! It feels like you’re constantly adding them to the shopping cart.
But what if I told you there’s a super simple, safe, and shockingly affordable way to handle diaper changes? As a pediatric nurse and lactation consultant, I’ve shared this little secret with countless families, and now I’m sharing it with you. Get ready to make your own natural, 3-ingredient baby wipes. Not only will you know exactly what’s touching your baby’s delicate skin, but you can also save a significant amount of money—we’re talking up to $500 a year! It sounds too good to be true, but I promise, it’s a game-changer. Let’s dive in and give your budget (and your baby’s bottom) some relief.
Why Go DIY? The Surprising Benefits Beyond Just Saving Money

Why Go DIY? The Surprising Benefits Beyond Just Saving Money
Making the switch to homemade baby wipes might seem like one more thing to add to your already-full plate, but hear me out. The rewards are more than just financial. You’re giving your baby a healthier start and making a choice you can feel amazing about.
Let’s Talk Numbers: The $500 Savings Promise
It sounds like a bold claim, but the math is simple. Let’s break it down:
- Store-Bought Wipes: The average cost is around $0.03 to $0.05 per wipe, especially for natural or sensitive skin brands. A newborn can easily go through 10-12 diapers a day. If you use 2-3 wipes per change, that’s about 30 wipes daily, or 900 wipes a month! At $0.04 per wipe, you’re spending $36 per month, which adds up to $432 per year. For bigger messes or multiple kids, this number can easily surpass $500.
- DIY Wipes: A roll of heavy-duty paper towels ($2) makes about 200-300 wipes. A bottle of Castile soap ($10) and a jar of coconut oil ($8) will last you for many, many batches. Your per-wipe cost plummets to less than $0.01 per wipe. The annual savings are real, and they can be redirected to a college fund, a date night, or just some much-needed coffee!
Complete Control Over Ingredients
Take a look at the ingredient list on a standard package of baby wipes. You might see a long list of words you can’t pronounce, including fragrances, alcohols, and preservatives like parabens and phthalates. While most are deemed safe, a newborn’s skin is incredibly thin and sensitive. These chemicals can sometimes cause dryness, irritation, or diaper rash. When you make your own, the ingredient list is short, sweet, and completely transparent. You are in charge. No hidden chemicals, no harsh fragrances—just gentle, natural goodness.
A Kinder Choice for the Planet
Think about all those plastic tubs and non-biodegradable packages. They add up! By making your own wipes, you can store them in a single reusable container, drastically cutting down on your household’s plastic waste. If you want to take your eco-friendly game to the next level, you can even make this recipe using reusable cloths (like soft flannel squares) instead of paper towels. It’s a small change that makes a big impact over time.
Gathering Your Arsenal: The ‘Big 3’ Natural Ingredients & Essential Supplies
Gathering Your Arsenal: The ‘Big 3’ Natural Ingredients & Essential Supplies
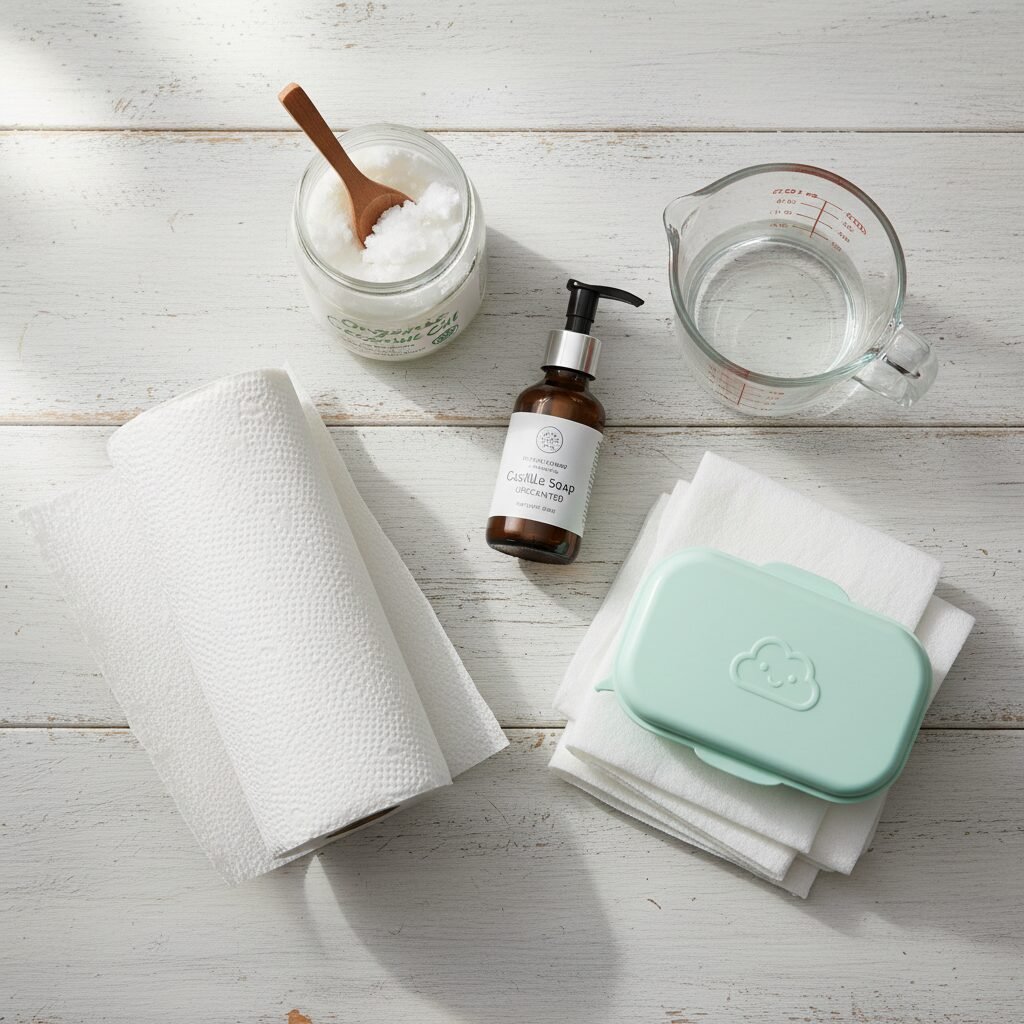
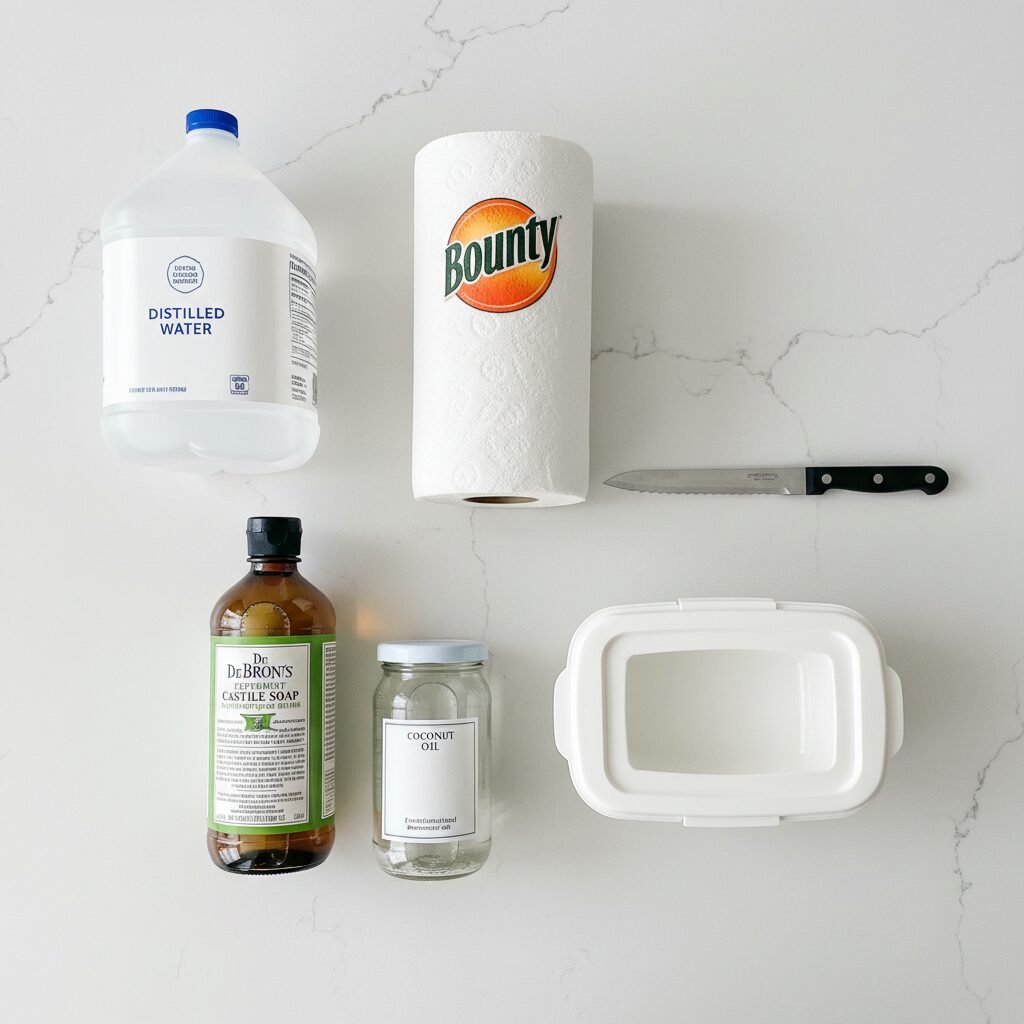
Ready to become a DIY pro? The beauty of this recipe is its simplicity. You only need a few key things, most of which you might already have or can easily find at any grocery store. Let’s assemble our toolkit.
The ‘Big 3’ Recipe Ingredients
- Distilled Water: You’ll want about 2 cups of warm water. Why distilled? Tap water contains minerals and impurities that can cause bacteria or mold to grow more quickly in your wipe solution. Using distilled water is a crucial safety step that helps your wipes stay fresh longer. Warm water helps the oil and soap mix together more easily.
- A Gentle, Nourishing Oil: Two tablespoons are all you need. This is the magic ingredient for moisturizing and protecting your baby’s skin. It creates a gentle barrier that helps prevent diaper rash. Great options include:
- Fractionated Coconut Oil: It stays liquid at room temperature and is known for its antimicrobial properties.
- Sweet Almond Oil: Rich in Vitamin E and very gentle on sensitive skin.
- Olive Oil: A simple, effective moisturizer you probably already have in your kitchen!
- A Mild Liquid Soap/Cleanser: Add two tablespoons of a gentle cleanser for a little bit of cleaning power. The key is to choose something incredibly mild and safe for babies. My top recommendations are:
- Unscented Pure Castile Soap: Dr. Bronner’s is a popular choice. It’s natural, vegetable-based, and very concentrated, so a little goes a long way.
- Your Favorite Tear-Free Baby Wash: If you already have a baby wash you love and trust, you can absolutely use that!
Essential Supplies
- A Roll of Heavy-Duty Paper Towels: Don’t skimp here! A strong, durable brand (like Viva or Bounty) will hold up to the liquid without shredding. ‘Select-a-size’ rolls are often the perfect height for standard containers once cut.
- An Airtight Container: This is where you’ll store your wipes. You can reuse an old plastic wipe dispenser, a round plastic container with a lid, or even a large glass food storage container.
- A Sharp Serrated Knife: A bread knife works perfectly for cutting the paper towel roll in half.
- Measuring Cups and Spoons & a Mixing Bowl: For measuring and mixing your magic solution!
Your Step-by-Step Guide to Perfect Homemade Wipes

Your Step-by-Step Guide to Perfect Homemade Wipes
Alright, it’s time for the fun part! This process takes less than 10 minutes, and once you do it once, you’ll be able to whip up a batch in your sleep (though we both know you’re not getting much of that right now!). Follow these simple steps for flawless DIY wipes every time.
- Cut the Roll: Take your roll of heavy-duty paper towels and a sharp serrated knife. On a cutting board, carefully saw the roll in half. You’ll be left with two shorter, stout rolls. You only need one for this recipe, so you can save the other for your next batch!
- Place in Container: Stand one of the paper towel halves on its end and place it inside your airtight container. It should fit snugly. If it’s a bit too tall, you can trim it or just squish it down a little.
- Mix Your Solution: In a separate mixing bowl, add 2 cups of warm distilled water. Add your 2 tablespoons of oil and 2 tablespoons of gentle soap. Whisk it all together until it’s well combined. The oil might separate a bit, and that’s totally okay.
- Pour It Over: Slowly and evenly pour the liquid mixture all over the top of the paper towel roll in the container. Try to cover the entire surface to ensure every part gets saturated.
- Let It Absorb: Put the lid on your container and let it sit for about 10-15 minutes. This gives the paper towels time to soak up all that wonderful, natural solution from top to bottom. For extra-even distribution, you can flip the container upside down halfway through.
- Remove the Core: After it has finished soaking, open the lid. You should be able to easily reach into the center of the roll and pull out the cardboard tube. It will be damp and should slide right out.
- Ready to Use! Once the tube is out, the first wipe from the center of the roll should pop up, ready for you to pull. Voila! You have a container full of fresh, natural, homemade baby wipes.
Customizing Your Wipes & Important Safety Notes
Customizing Your Wipes & Important Safety Notes
One of the best parts of this DIY recipe is how easily you can tweak it to perfectly suit your baby’s skin. However, with great power comes great responsibility! It’s crucial to prioritize safety, especially when dealing with that precious newborn skin.
Optional Add-Ins (With Caution!)
If you’re feeling adventurous, you can add a little something extra to your solution. Always remember to introduce one new ingredient at a time and do a patch test on a small area of your baby’s arm or leg first.
- Aloe Vera Gel: Add a tablespoon of pure aloe vera gel for extra soothing and anti-inflammatory properties. It’s wonderful for babies with particularly sensitive skin.
- Vitamin E Oil: A few drops can help to further nourish the skin and also acts as a mild natural preservative.
- Witch Hazel: A tablespoon of alcohol-free witch hazel can provide gentle astringent properties, which can be helpful for rash-prone skin.
- Essential Oils: This is an area to be extremely cautious. If you choose to use them, add only 1-2 drops of a baby-safe oil like lavender or chamomile. Ensure it is a 100% pure, therapeutic-grade oil. Many essential oils are too strong for a baby’s system, so when in doubt, it’s best to leave them out.
Crucial Safety & Storage Tips
This is the most important part of the whole process. Please read this carefully!
Because this recipe contains water and no chemical preservatives, it is essential to make small batches frequently. I recommend making a new batch every 1-2 weeks to prevent the growth of mold or bacteria. Before each use, give the wipes a quick visual check and a sniff. If they smell off or you see any discoloration, discard the entire batch immediately and make a fresh one.
To ensure your wipes stay safe:
- Always Use Distilled Water: I can’t stress this enough! It’s the number one way to inhibit bacterial growth.
- Keep It Airtight: Always store your wipes with the lid sealed tightly to keep them fresh and free from contaminants.
- Store in a Cool, Dark Place: Avoid leaving the container in direct sunlight or a hot car, as warmth can accelerate spoilage.
- Wash Your Hands: Always wash your hands before making a new batch and before reaching into the container to grab a wipe.
Troubleshooting Common DIY Wipe Woes

Troubleshooting Common DIY Wipe Woes
Even the simplest recipes can have a hiccup now and then. Don’t worry! Most issues are an easy fix. Here are some common questions and solutions I’ve shared with parents over the years.
‘My wipes seem too dry on top and soggy on the bottom!’
This is a common one! It just means the liquid hasn’t fully distributed. The easiest fix is to flip the sealed container upside down and let it sit for an hour or two (or even overnight). This allows gravity to pull the solution back through the top layers. For your next batch, you can also try pouring the solution a little more slowly to give it time to sink in.
‘Help! My wipes are ripping apart when I pull them out.’
This is almost always due to the brand of paper towels. Some are just not built to withstand being soaked in liquid. Invest in a truly heavy-duty, durable brand. It might cost a dollar more, but it will save you the frustration of flimsy wipes. Using two-ply paper towels can also make a big difference.
‘Can I use reusable cloths instead of paper towels?’
Absolutely! This is a fantastic, zero-waste option. Simply cut up some soft fabric like flannel, old t-shirts, or cotton into wipe-sized squares. Make your solution as directed, and then you have two options: you can either pour the solution over the folded cloths in your container (just like with the paper towels) or you can store the cloths dry and keep the solution in a spray bottle to spritz on each cloth as needed. Just be sure to have a wet bag for the used wipes and wash them in a hot water cycle every 2-3 days.
| Problem | Quick Fix | Long-Term Solution |
|---|---|---|
| Wipes are too dry/wet | Flip the container upside down for a few hours. | Adjust the water in your next batch by 1/4 cup. |
| Wipes are tearing | Pull more gently from the center. | Switch to a more durable, heavy-duty brand of paper towels. |
| Wipes smell ‘off’ | Discard the entire batch immediately. | Make smaller batches more frequently (every 7-10 days). Always use distilled water. |
| Cardboard core won’t come out | The roll is likely not saturated enough. Add a bit more warm water and wait. | Ensure you let the wipes sit for at least 15 minutes before attempting to remove the core. |
Conclusion
See? I told you it was easy! In just a few minutes, you’ve created a product for your baby that is safer, more natural, and so much more affordable than anything you can buy in a store. You’re not just saving money; you’re taking one more step to create a gentle and non-toxic environment for your little one, and that is something to be incredibly proud of.
Being a new parent is all about finding what works for you and your family. Give this recipe a try, tweak it if you need to, and enjoy the peace of mind that comes with it. You’ve got this!