3 Ingredient All Natural Diaper Cream You Can Make At Home
Hey there, new parent. Take a deep breath. I know that standing in the baby aisle, staring at a wall of diaper creams with ingredient lists a mile long can feel incredibly overwhelming. You want the best for your baby’s delicate skin, but what does that even mean? Parabens, phthalates, fragrances… it’s a lot to decipher when you’re already running on three hours of sleep.
What if I told you that you could create a wonderfully effective, soothing, and completely natural diaper cream with just three simple ingredients you can probably find at your local grocery or health food store? As a pediatric nurse and lactation consultant, I’ve seen my share of diaper rashes, and I’m a huge advocate for going back to basics. This recipe is more than just a DIY project; it’s about giving you control, peace of mind, and a truly gentle solution for your little one’s most sensitive skin. Let’s get started!
Why Go DIY? The Magic Behind These 3 Simple Ingredients
Before we jump into the recipe, let’s talk about the why. Why bother making your own cream when there are so many options on the shelf? The answer lies in the pure, powerful simplicity of nature. Commercial creams can be fantastic, but they often contain preservatives, stabilizers, and fragrances that can, for some babies, be irritating. When you make it yourself, you know exactly what’s going on that precious bottom.
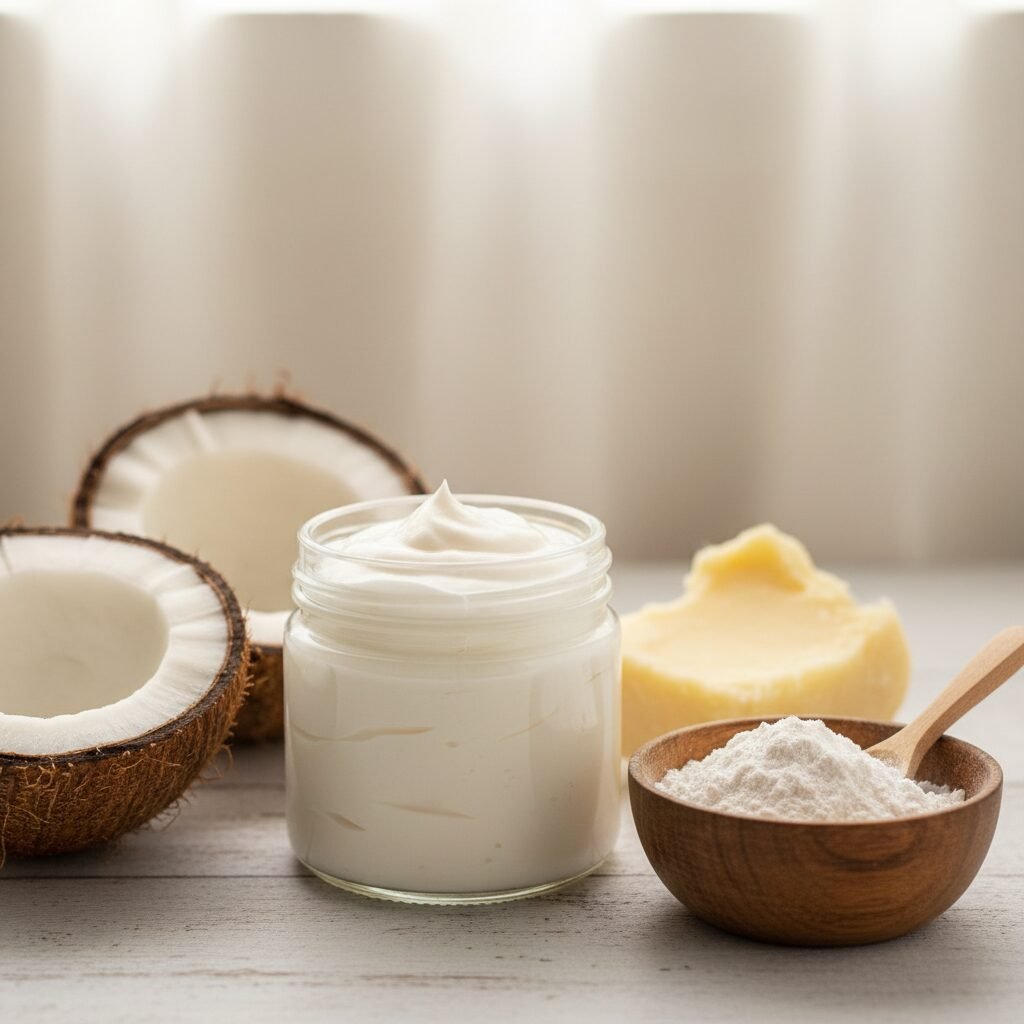
Meet Your All-Star Ingredients:
- Unrefined Coconut Oil: This isn’t just for cooking! Coconut oil is a powerhouse for baby skin. It’s naturally antibacterial and antifungal, which can help keep common diaper rash culprits (like yeast) at bay. It’s also an incredible moisturizer that soothes red, irritated skin. We recommend using unrefined, or virgin, coconut oil as it retains more of its natural beneficial properties.
- Raw Shea Butter: Harvested from the nut of the African shea tree, shea butter is rich in vitamins A and E. It has anti-inflammatory properties that help calm angry skin and provides a rich, breathable barrier that protects the skin from moisture without clogging pores. Think of it as a soft, natural shield for your baby’s bottom.
- A Gentle Thickener (Your Choice!): To give the cream a less oily, more paste-like consistency and to help absorb moisture, you need a thickener. You have two fantastic, all-natural options:
- Arrowroot Powder: This is a simple, plant-based starch that helps thicken the cream and absorb excess moisture, keeping your baby’s skin drier for longer. It’s silky, gentle, and perfect for a basic, everyday protective cream.
- Non-Nano Zinc Oxide: This is the active ingredient in most traditional diaper rash creams. It creates a formidable waterproof barrier on the skin, protecting it from wetness and irritation. It’s incredibly effective at treating existing rashes. It is critical to use non-nano zinc oxide. This means the particles are too large to be absorbed into the skin, so they just sit on the surface where they do their job safely.
A Quick Note on Safety: While these ingredients are natural, a small percentage of babies can have sensitivities. Always, always do a small patch test on your baby’s arm or leg 24 hours before applying it to the diaper area for the first time.
Gathering Your Supplies: What You’ll Need
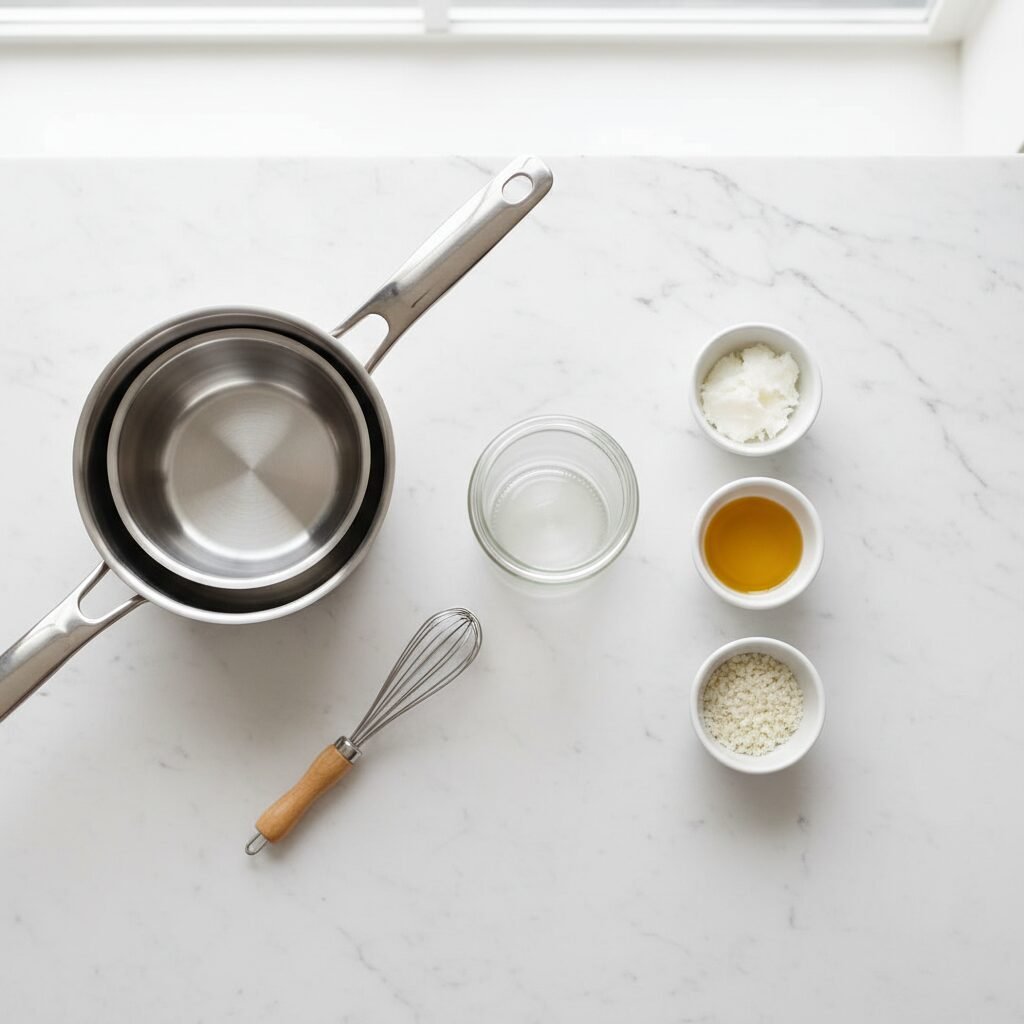
The best part about this recipe is how simple the setup is. You don’t need any fancy equipment. Here’s your complete checklist:
- A Double Boiler or a Makeshift Version: If you don’t have a double boiler, a heat-safe glass or metal bowl that fits snugly over a small saucepan with an inch or two of simmering water works perfectly. You can also use a microwave in short bursts, but the stovetop method gives you more control.
- Measuring Cups and Spoons: For accurate proportions.
- A Small Whisk or Fork: For mixing everything into a smooth, creamy consistency.
- A Small, Clean Glass Jar with a Lid: A 4-ounce mason jar is perfect for storing your finished cream. Make sure it’s sterilized or washed thoroughly with hot, soapy water and completely dry before you begin.
The Super Simple, Step-by-Step Recipe
Alright, it’s time to become a baby-care alchemist! This process should take you no more than 15 minutes. Here are the exact steps to create your magical cream.
The Ratios
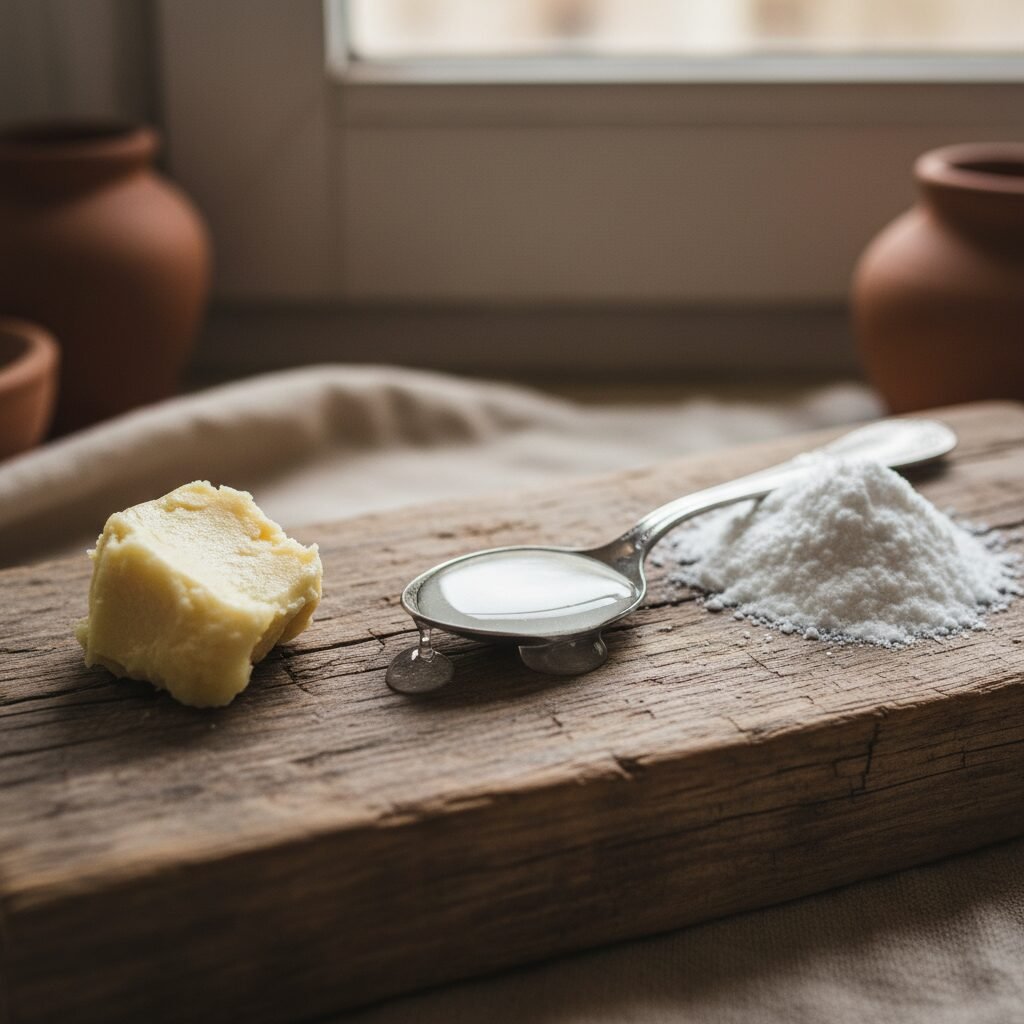
The base recipe is a simple 2-to-1 ratio of fat to powder. For a 4-ounce jar, this works perfectly.
| Ingredient | Everyday Protection Cream | Extra-Strength Rash Cream |
|---|---|---|
| Unrefined Coconut Oil | 1/4 cup | 1/4 cup |
| Raw Shea Butter | 1/4 cup | 1/4 cup |
| Arrowroot Powder | 2 tablespoons | – |
| Non-Nano Zinc Oxide Powder | – | 2 tablespoons |
The Instructions
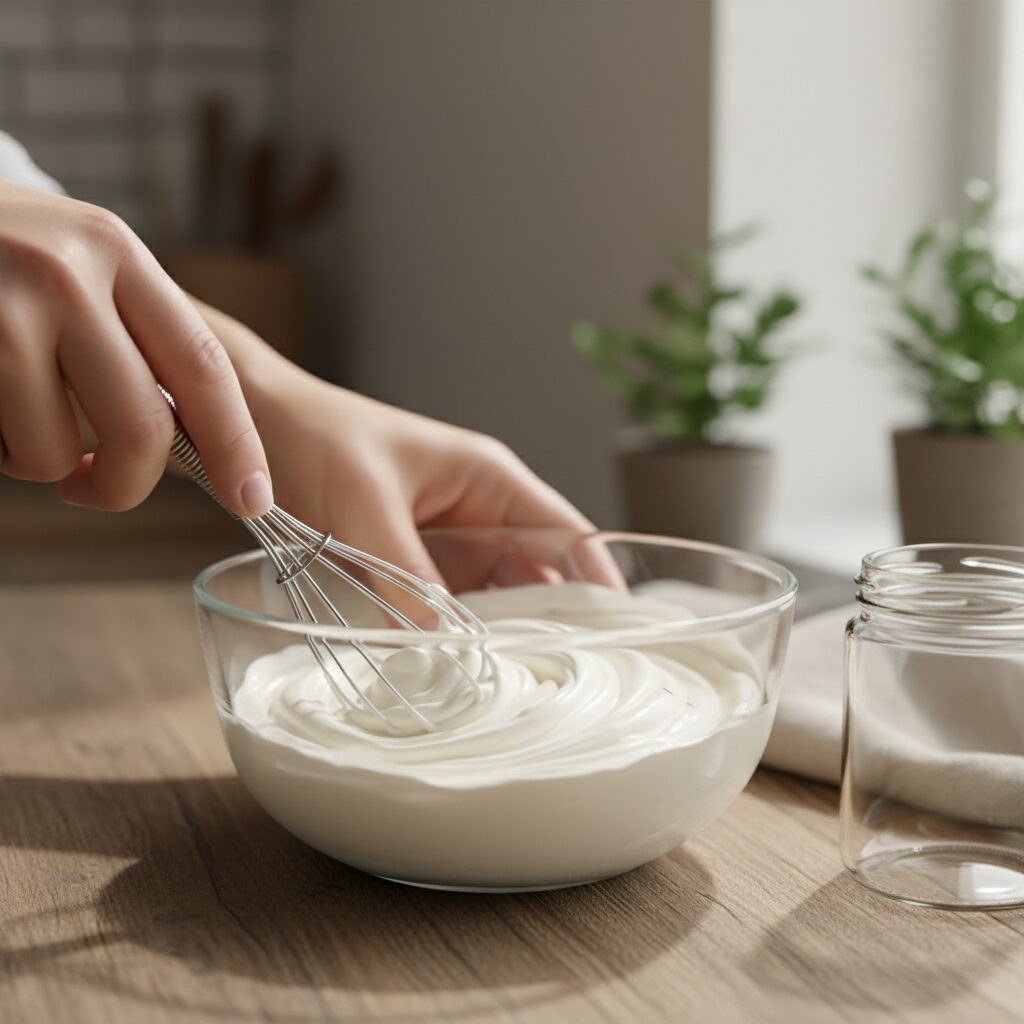
- Melt the Fats: Combine the coconut oil and shea butter in your double boiler or heat-safe bowl over low, simmering water. Stir occasionally until they are completely melted and combined. Avoid high heat, as it can damage the beneficial properties of the oils.
- Cool Slightly: Remove the bowl from the heat and let it cool for 5-10 minutes. It should still be liquid, but not piping hot. This is important because if you add the powder when it’s too hot, it can become clumpy.
- Whisk in the Powder: Slowly sprinkle in your chosen powder (either arrowroot or non-nano zinc oxide) while whisking continuously. Keep whisking until the powder is fully incorporated and the mixture is smooth and free of lumps. If using zinc oxide, be careful not to inhale the fine powder.
- Pour and Set: Carefully pour the liquid mixture into your clean, dry glass jar.
- Let it Firm Up: You can leave the jar on the counter for a few hours to firm up naturally, or if you’re in a hurry, you can place it in the refrigerator for about an hour. The final consistency will be a soft, smooth balm that melts slightly on contact with the skin.
How to Use and Store Your Homemade Cream

Now that you’ve created your beautiful, natural diaper cream, let’s talk about how to get the most out of it.
Application Tips
- Start with a Clean, DRY Canvas: This is the golden rule of diaper rash prevention. After cleaning your baby’s bottom, pat the area completely dry with a soft cloth or let it air dry for a few minutes. Trapping moisture under a cream can make a rash worse.
- A Little Goes a Long Way: You don’t need to slather it on like frosting. A thin, even layer is all that’s needed to create a protective barrier.
- Warm it Up: The cream will be firm in the jar. Scrape a small, pea-sized amount out with a clean finger or a small spoon and warm it between your fingers. It will soften instantly, making it easy to spread gently over your baby’s skin.
Storage and Shelf Life
Since your cream contains no water or preservatives, it’s surprisingly shelf-stable. Store it in a cool, dark place (like a drawer or cabinet) with the lid on tight. It should last for at least 3-6 months. In very warm climates, the coconut oil might melt, causing some separation. If this happens, just give it a good stir and pop it in the fridge for a bit to firm up again. Discard it if you notice any strange smells or signs of mold, which is very unlikely in this oil-based recipe.
Important Safety Notes & When to Call the Doctor

As a nurse, I have to end with the most important part: safety first. While this cream is wonderfully gentle, every baby is different. It’s essential to know what’s normal and when a simple diaper rash might be something more.
Listen to Your Baby’s Skin
Remember that patch test we talked about? It’s your best friend. Before using the cream in the diaper area, apply a tiny amount to your baby’s inner arm or leg and wait 24 hours to ensure there is no redness or irritation. This is especially important for babies with a known history of sensitive skin or eczema.
Warning: If a diaper rash does not start to improve within 2-3 days, gets worse, or is accompanied by blisters, pimples, or a fever, it’s time to stop home treatment and call your pediatrician. It could be a yeast infection or a bacterial infection that requires a prescription treatment.
Signs It’s More Than a Simple Rash:
- Bright, beefy red rash with small red dots or “satellite spots” spreading outwards. This is often a sign of a yeast rash.
- Yellowish crusting, weeping, or small pus-filled bumps. This may indicate a bacterial infection.
- The rash is extremely painful to the touch, and your baby is unusually fussy.
- The rash spreads beyond the diaper area.
Trust your parental instincts. You know your baby best. Never hesitate to reach out to a healthcare professional if you’re concerned. Making your own diaper cream is an act of love, and so is knowing when to seek expert medical advice.
Conclusion
There you have it! You’ve just learned how to create a safe, effective, and all-natural diaper cream with your own two hands. By choosing simple, high-quality ingredients, you’re not just soothing a rash—you’re providing a touch of pure, loving care. It’s one small way to simplify the beautiful, chaotic journey of parenthood and feel confident about what you’re putting on your baby’s skin.
So give it a try. Enjoy the process, and take a moment to feel proud of what you’ve made. You’re doing an amazing job, and your baby’s happy, healthy bottom will thank you for it. You’ve got this!