7 Genius Hacks For Changing A Diaper In The Car (No Table Needed)
Hey there, new parent. Let’s talk about a scenario that strikes fear into the hearts of even the most seasoned caregivers: the dreaded car diaper blowout. You’re cruising along, maybe on a family road trip or just running errands, when that unmistakable aroma hits you. You glance in the rearview mirror and see the evidence. There’s no rest stop in sight, no clean public restroom, and definitely no changing table. Just you, your baby, and a ticking time bomb of a diaper.
Take a deep breath. We have all been there. As a pediatric nurse and lactation consultant, I’ve heard every frantic story and seen every makeshift changing setup you can imagine. The good news? You don’t need to panic or resign yourself to a messy, awkward ordeal. Changing a diaper in the car can be a smooth, clean, and surprisingly simple operation with a little bit of preparation and a few clever tricks up your sleeve.
Forget contorting yourself in a cramped back seat or worrying about making a huge mess. We’re going to turn your vehicle into a fully functional, on-the-go changing station. These aren’t just tips; they’re road-tested, nurse-approved hacks that will give you the confidence to handle any diaper situation, anywhere. Let’s get you ready to roll!
Hack #1: Assemble the Ultimate Car Diaper Caddy
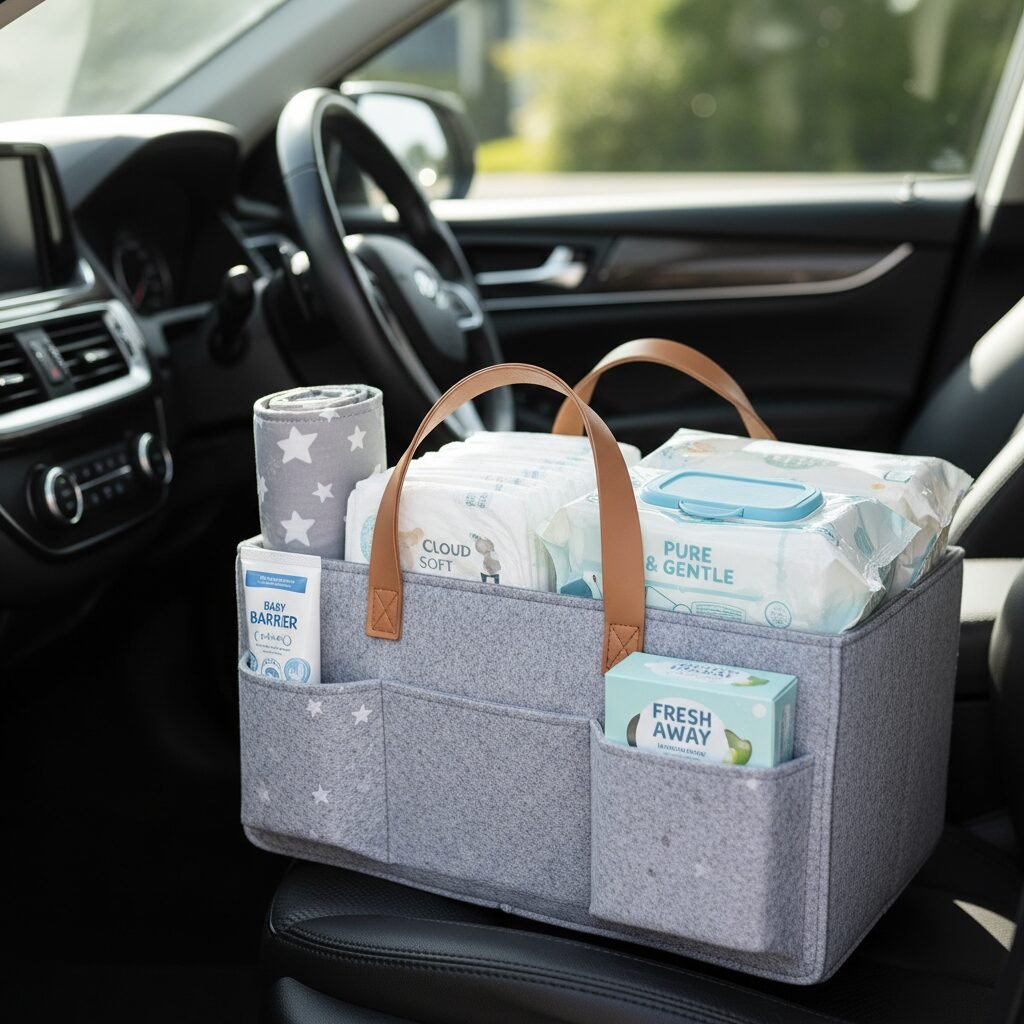
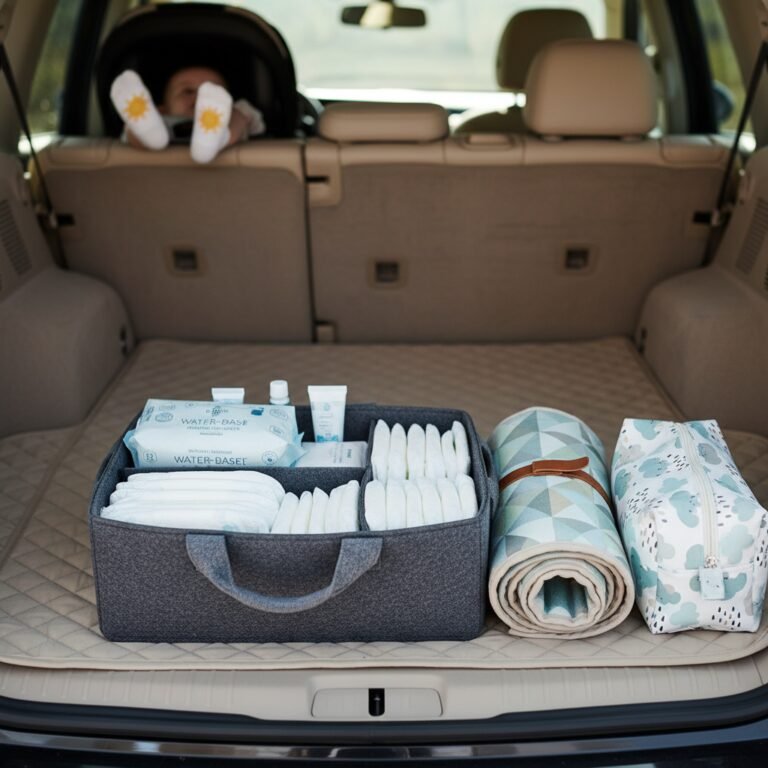
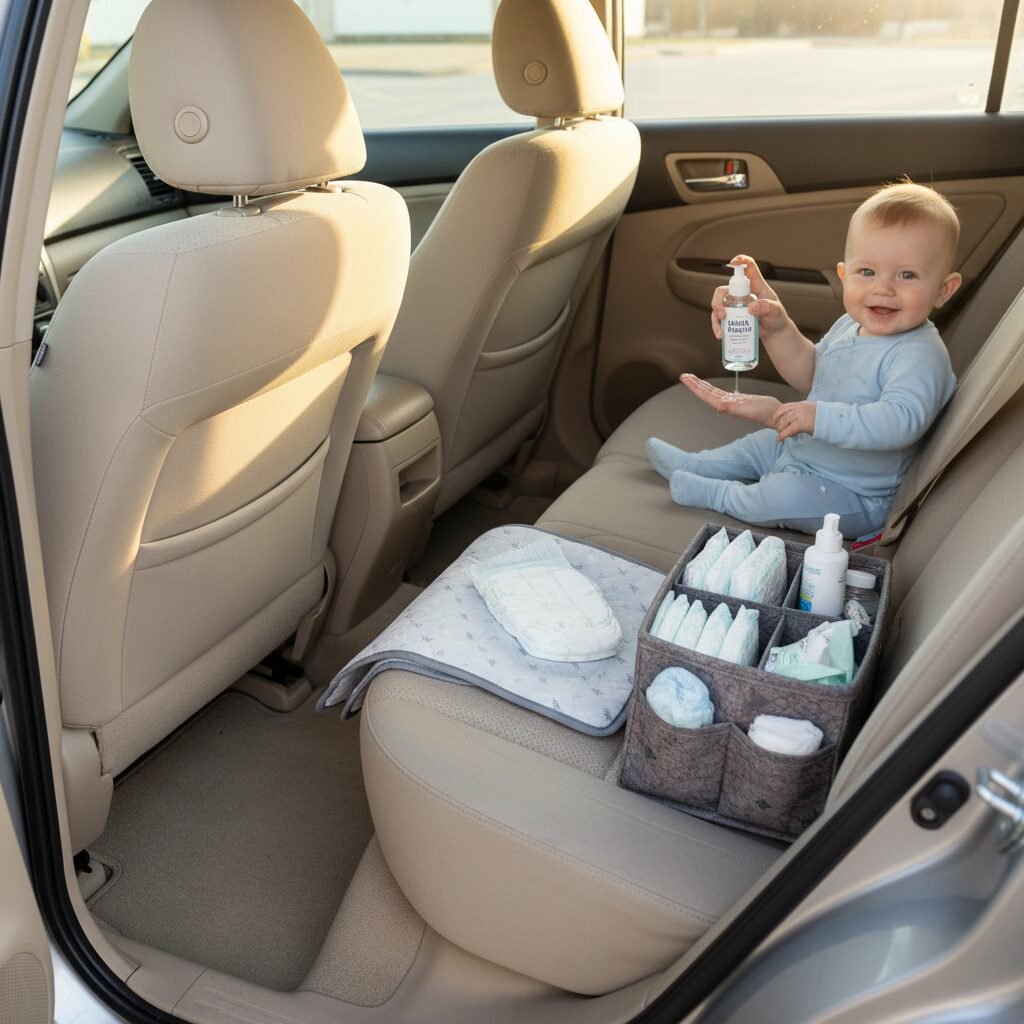
The number one rule of successful car diaper changes is being prepared. Fumbling around a giant, overstuffed diaper bag while your baby is getting fussy is a recipe for disaster. The solution is a dedicated, always-stocked Car Diaper Caddy. This isn’t just a smaller version of your main bag; it’s a specialized triage kit designed for quick, efficient changes in tight spaces.
What to Include in Your Caddy:
Think lean and mean. You only need the absolute essentials to get the job done. Find a small, structured tote or basket that can sit securely on the floor or a seat without tipping over.
- Diapers: Stock at least 5-6 diapers. More than you think you’ll need for one trip, but enough to cover multiple emergencies without restocking every day.
- Wipes: A full-size pack, not a small travel one that will run out when you need it most. Opt for a pack with a flip-top lid you can open with one hand.
- A Foldable Changing Mat: Choose one that’s waterproof and easy to wipe clean. This is your clean surface, protecting both your baby and your car’s upholstery.
- Disposable Liners (The Secret Weapon): We’ll talk more about this in Hack #3, but having a few disposable waterproof pads (like puppy training pads) is a game-changer for explosive situations.
- Diaper Cream: A small tube of your preferred barrier cream.
- Hand Sanitizer: For a quick clean-up for you when soap and water aren’t available.
- Disposal Bags: Scented diaper sacks or dog waste bags are perfect for sealing away the dirty diaper and wipes, containing the mess and the smell until you can find a proper trash can.
- A Full Change of Clothes for Baby: Just one simple outfit—a onesie and pants or a sleeper. Roll it up tightly to save space. Trust me, the one time you don’t have this, you will need it.
Nurse’s Tip: Restock your caddy as soon as you get home. Make it a habit, like grabbing the mail. The next time you have a diaper emergency, Future You will be so grateful to Past You for being so prepared.
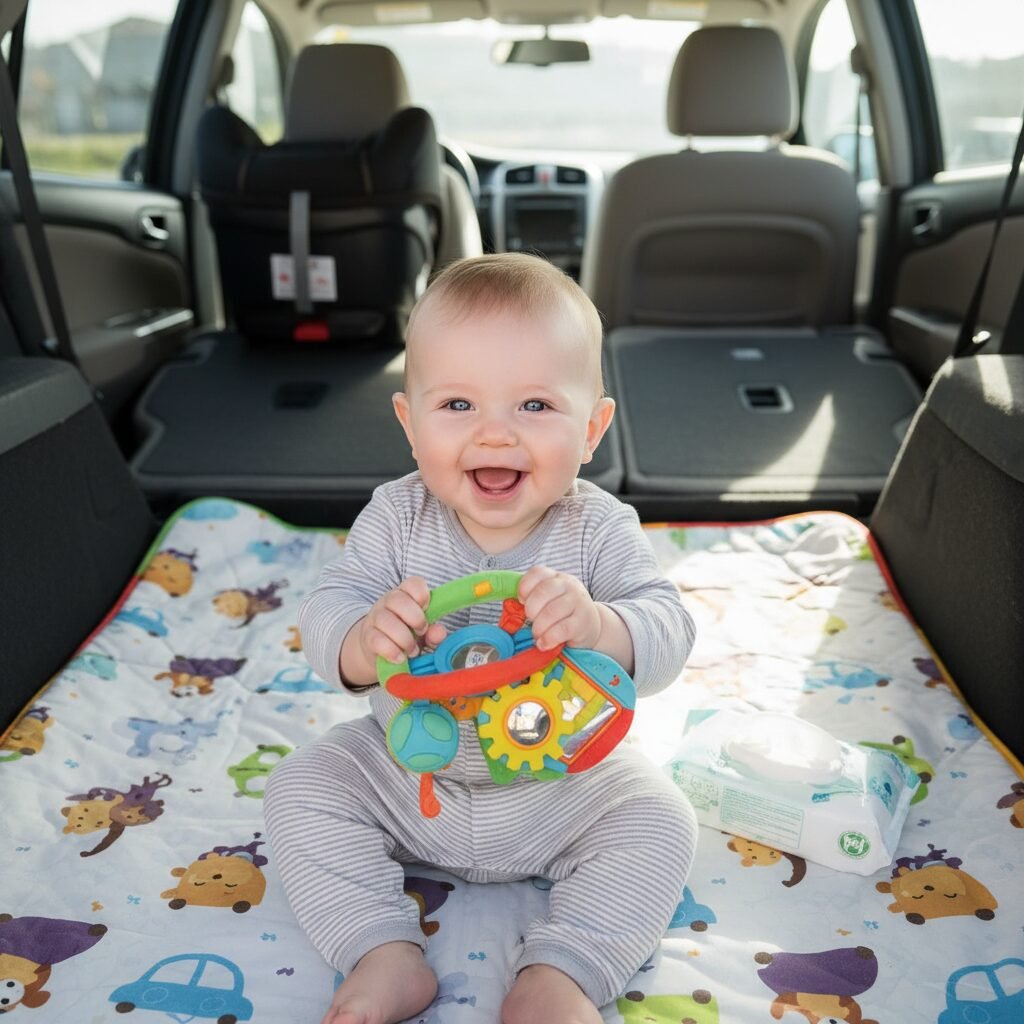
Keeping this caddy in your car at all times means you’re never caught off guard. Whether you’re on a long journey or just a quick trip to the grocery store, your mobile changing station is ready for action.
Hack #2: Choose Your Battle Station: Front Seat vs. The Trunk
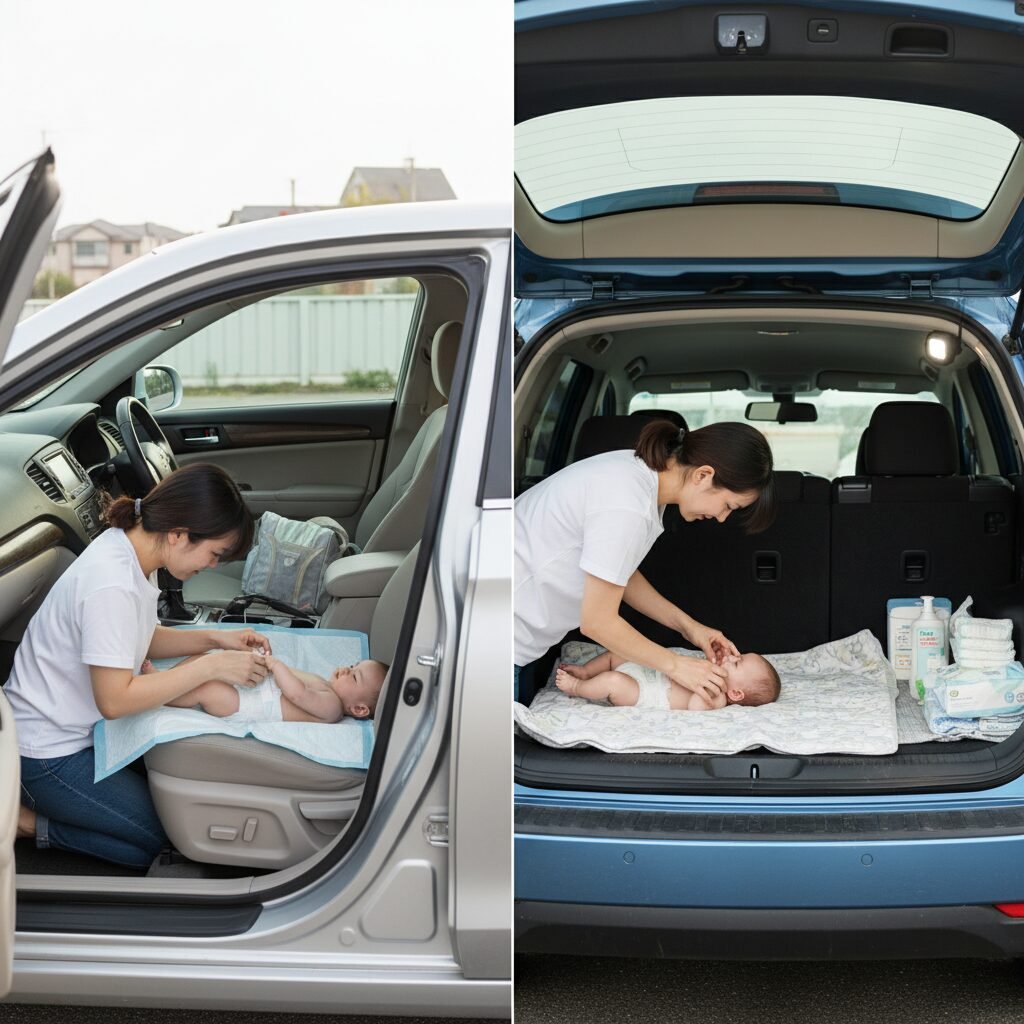
Okay, you’re prepped and ready. Now, where in the car do you actually perform the change? You have a few great options, and the best one depends on your vehicle, your baby, and the scale of the mess. The back seat is often too cramped and awkward. Let’s focus on the two prime locations: the front passenger seat and the trunk.
The Front Seat Fortress
The front passenger seat can be an excellent choice. Its bucket shape provides a natural contour that helps keep a squirmy baby from rolling. It’s best for smaller babies and less explosive diaper situations.
How to do it safely:
- Safety First: Before you do anything, ensure the car is in park, the engine is off, and the doors are locked. Never attempt a change while the vehicle is in motion or even idling.
- Set Up: Recline the seat back as far as it will go to create the flattest, largest surface possible.
- Protect: Lay down your waterproof changing mat, making sure it covers the seat completely.
- Position Baby: Lay your baby down with their head towards the back of the seat and their feet towards the dashboard. This gives you plenty of room to work.
- Supplies Ready: Place your open pack of wipes, a clean diaper, and the disposal bag on the dashboard or in the passenger-side door compartment, all within easy reach.
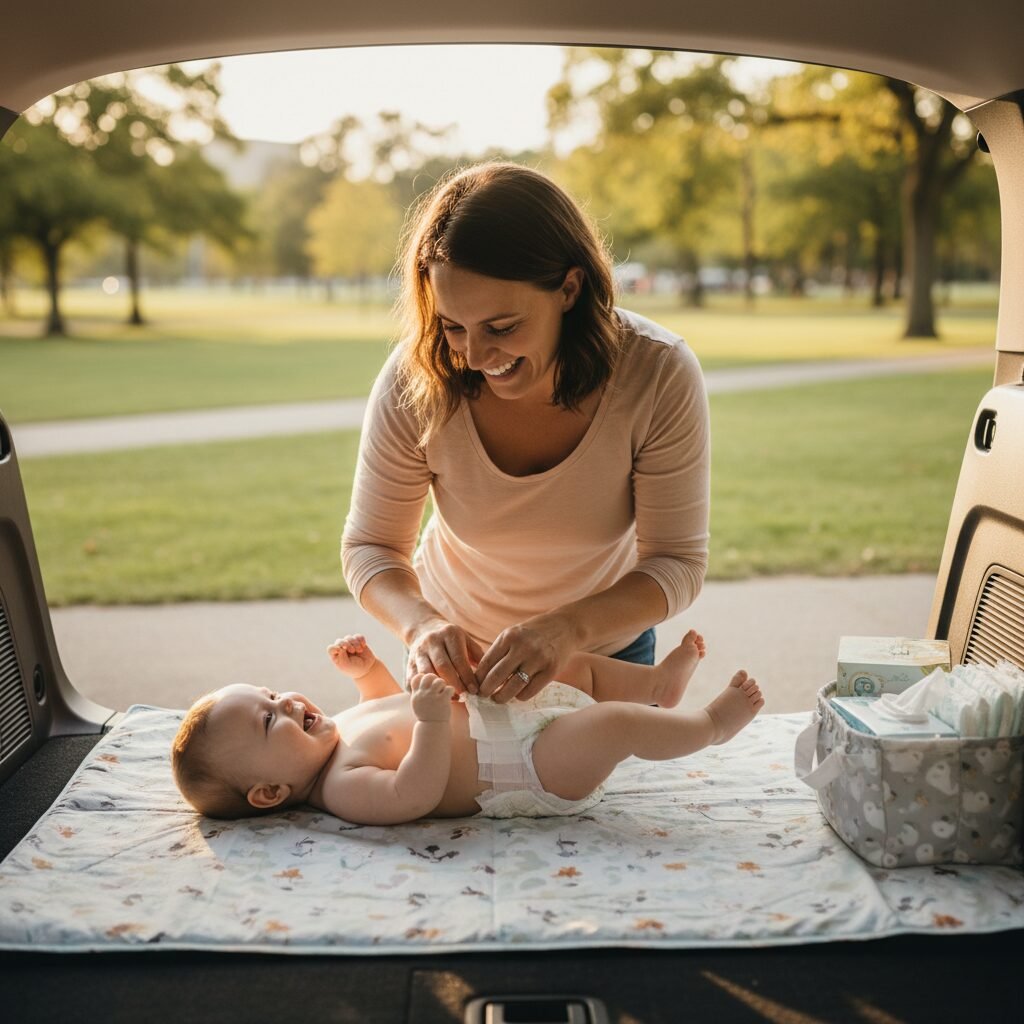
The Trunk Transformation
If you have an SUV, minivan, or hatchback, the trunk is your luxury suite of car changing stations. It offers a wide, flat surface that’s perfect for bigger babies or when you need more space to manage a major blowout.
How to do it safely:
- Safety First: Park on a flat, level surface away from traffic. Turn on your hazard lights if you’re on the shoulder of a road.
- Create a Barrier: Stand with your body between the open trunk and any potential traffic. You are the safety barrier for your baby.
- Set Up: Lay down your changing mat. If it’s a big mess, this is the time to put a disposable puppy pad on top of your reusable mat for easy cleanup.
- Position Baby: Lay your baby perpendicular to the car (sideways). This keeps their head and feet away from the bumper and latch mechanism.
- Supplies Ready: Line up all your supplies from your caddy right next to the mat. The trunk offers enough space to have everything laid out like a real changing table.
Quick Comparison Table
Still not sure which to choose? Here’s a quick breakdown.
| Feature | Front Seat Fortress | Trunk Transformation |
|---|---|---|
| Best For | Smaller babies, quick changes, sedans | Bigger babies, major blowouts, SUVs/Hatchbacks |
| Pros | Contoured seat helps contain baby, climate-controlled, easy access from driver’s seat | Large, flat surface, lots of space for supplies, keeps mess contained in one area |
| Cons | Limited space, potential for mess on upholstery if mat slips | Exposed to weather, requires getting out of the car, only works for certain vehicle types |
| Key Safety Tip | Car off, in park, doors locked. | Park on level ground away from traffic, use hazard lights. |
Hack #3: The ‘Puppy Pad’ Shield: Your Secret Weapon
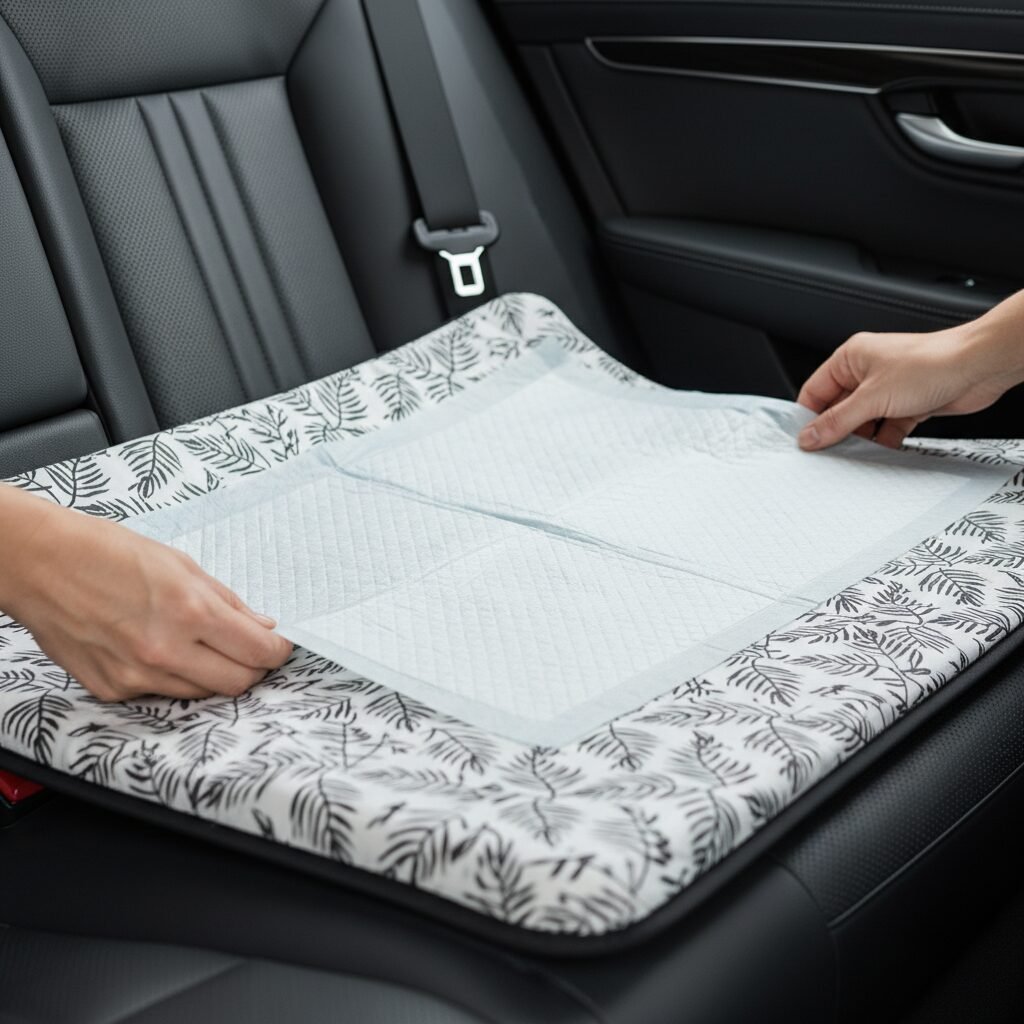
This might be the single most valuable hack on this list. Go to any pet store or supermarket and buy a pack of disposable puppy training pads. Keep a few of these flat pads in your car caddy at all times. They are your secret weapon against the dreaded ‘poonami’.
Why are they so brilliant? Your reusable changing mat is great, but when you’re dealing with a truly epic mess, the last thing you want is to have to roll up a soiled mat and put it back in your car. It’s a contamination nightmare. The puppy pad solves this problem completely.
The Layering Technique
Here’s how to use them for maximum effectiveness:
- Lay down your foundation: Put your regular, reusable waterproof changing mat down first. This is your primary barrier to protect your car’s interior.
- Add the disposable shield: Place a fresh puppy pad directly on top of your changing mat.
- Perform the change: Change your baby on top of the puppy pad. Its absorbent core will soak up any unexpected leaks, and its plastic backing prevents anything from seeping through.
- The Magic Cleanup: This is the best part. When you’re done, simply place the dirty diaper and used wipes in the center of the puppy pad, roll the entire thing up into a neat, self-contained ball of mess, and pop it into your disposal bag.
Voilà! Your reusable changing mat is still perfectly clean. There’s no smearing, no extra wiping, and no lingering mess to deal with later. You’ve contained the entire disaster zone in one disposable package. This trick not only saves your car’s upholstery but also saves your sanity. It turns a potential 10-minute cleanup job into a 10-second wrap-up.
Friendly Advice: Don’t feel weird about buying puppy pads! The parenting community has widely adopted this hack. You’re not buying them for a pet; you’re buying them for your peace of mind. They are inexpensive, lightweight, and one of the smartest parenting tools you can have in your arsenal.
Hack #4: Master the Art of Distraction
A calm, cooperative baby is the key to a quick and easy diaper change anywhere, but it’s especially crucial in the car. A wiggly, crying baby who is trying to perform a crocodile death roll on your front seat can turn a simple change into an impossible task. This is where your distraction arsenal comes into play.
The trick is to have a few special items or tricks that are reserved only for car diaper changes. This makes them novel and highly effective at capturing your baby’s attention.
Your Distraction Toolkit
- A Special Toy: Designate a small, engaging toy that lives in your car caddy. It shouldn’t be a toy they play with all the time. It could be something with crinkly sounds, a soft rattle, or a high-contrast board book. When it only comes out during diaper changes, it holds their attention for much longer.
- The Magic of Keys: Not your actual car keys, of course! But a set of toy keys can be mesmerizing for a baby. The jangling sound and interesting shapes are often enough to keep their hands busy and away from the diaper area.
- Sing a Special Song: Have a go-to diaper change song that you sing with gusto. Make it silly, with funny noises and hand motions. Your baby will be so focused on your performance that they’ll forget to fuss. ‘The Wheels on the Bus’ is a classic for a reason!
- A Pacifier on Deck: If your baby takes a pacifier, have a clean one ready to pop in their mouth right before you start. The sucking reflex is naturally calming and can work wonders.
- Use Your Phone (Judgement-Free!): In a true diaper emergency, do not hesitate to use your phone. A short, colorful video of nursery rhymes or a screen with a baby-friendly app can provide the 30-60 seconds of mesmerized stillness you need to get the job done quickly and cleanly. This is about survival, not screen time rules.
Remember, the goal is to keep their minds and hands occupied. Talk to your baby throughout the entire process. Describe what you’re doing in a calm, happy voice: ‘Okay, let’s get these wet pants off! One leg out… and now the other leg! So much better. Here comes a nice, clean diaper!’ Your calm energy is contagious and will help keep them relaxed.
Hack #5: The ‘One-Handed Wipe’ Technique
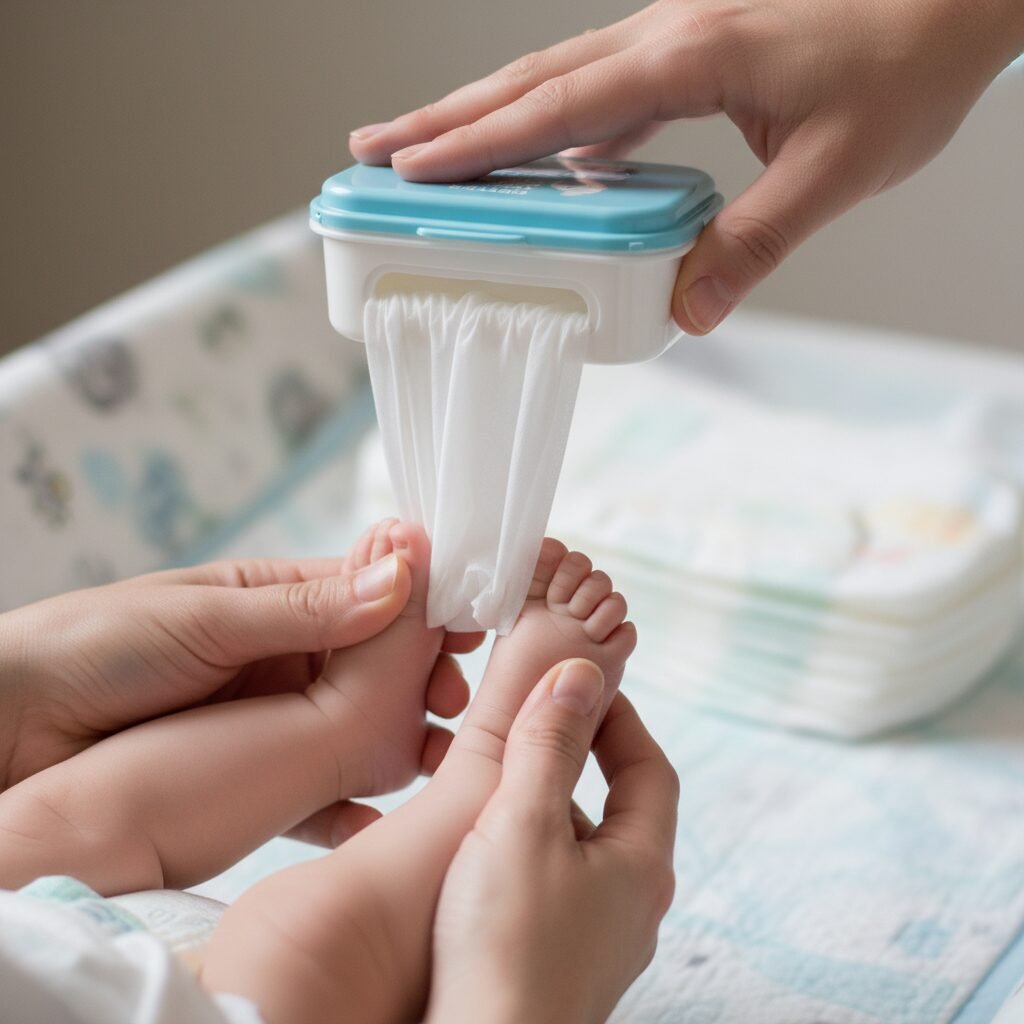
In the tight quarters of a car, you often only have one hand free to grab wipes while the other is safely holding your baby’s legs. Fumbling with a stubborn wipes package can be incredibly frustrating. Mastering the one-handed wipe grab is a pro-level parenting move that will make you feel like a superhero.
Setting Yourself Up for Success
It starts with the right gear and setup.
- Choose the Right Wipes Package: The single most important factor is a package with a rigid, plastic, flip-top closure. Avoid the packages with a flimsy sticker seal at all costs! That sticker will lose its stickiness after a few uses, and you’ll be left wrestling with a dried-out pile of wipes.
- Pre-Pull the First Wipe: Before you even lay your baby down, open the flip-top and pull the first wipe up so it’s ‘queued’ and ready to grab. This simple prep step is a game-changer.
- Strategic Placement: Place the open wipes package on a stable surface within arm’s reach, like the dashboard, the center console, or flat on the trunk floor next to you. Make sure it’s positioned so you can press down on it.
Executing the Maneuver
With one hand holding your baby’s ankles and lifting their bottom, use your free hand to execute the grab:
- Step 1: The Pin: Use the heel of your free hand or your forearm to press down firmly on the body of the wipes package. This holds it in place so it doesn’t slide around.
- Step 2: The Pinch & Pull: Use your fingers on that same hand to pinch the ‘queued up’ wipe and pull it out. Because most wipes are interleaved, pulling one will automatically pop the next one up, ready for the next grab.
It might feel a little awkward at first, but practice it a few times. Soon, it will become second nature. You’ll be able to pin, pinch, and pull a wipe without even looking. This technique keeps one hand securely on your baby at all times, which is crucial for safety, especially when they start to get bigger and stronger.
Safety First: The golden rule of diaper changing is to always keep at least one hand on your baby. They can wriggle and roll in a split second. Mastering the one-handed wipe grab makes it so much easier to follow this rule without compromising efficiency.
Hack #6: Containment & Disposal Done Right
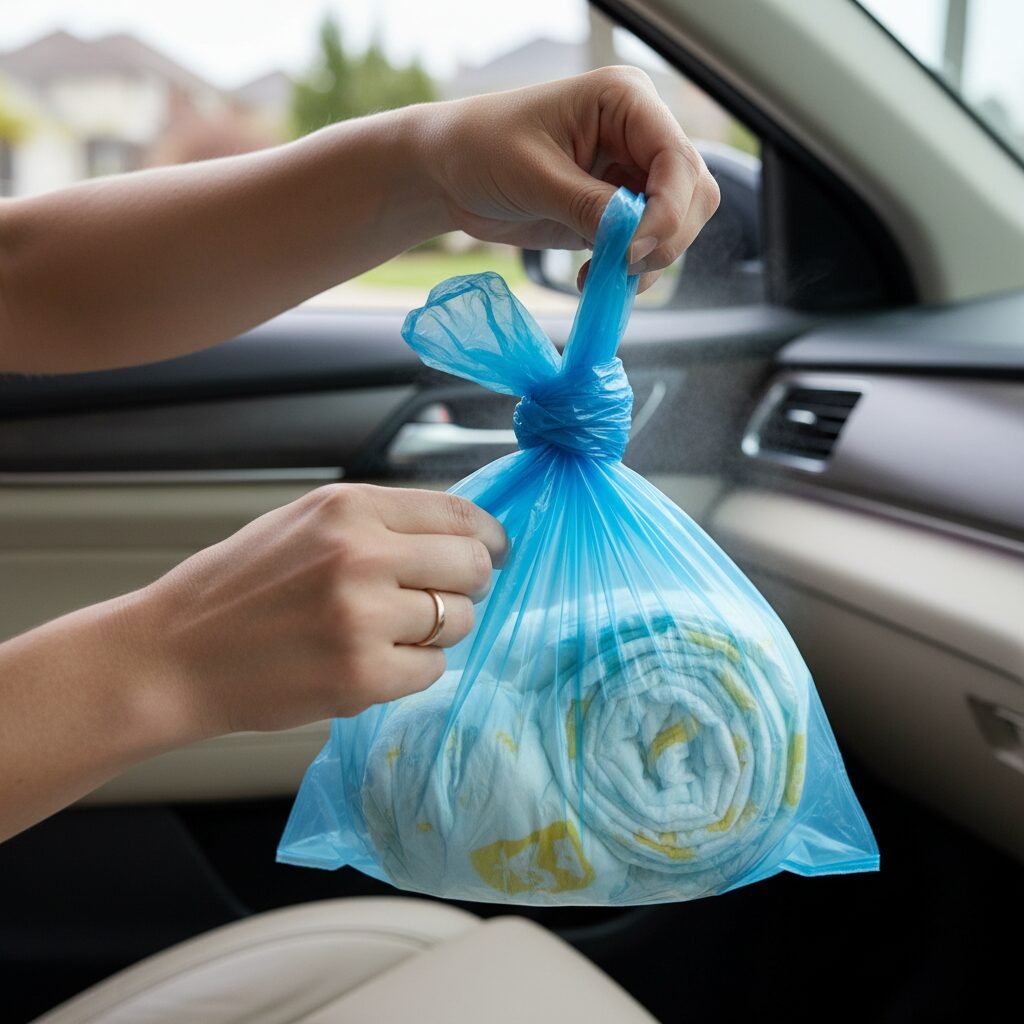
You’ve successfully changed the diaper. Hooray! But now you’re holding a… biological weapon. What do you do with it? Tossing a dirty diaper into your car’s little door trash bin is not an option, and leaving it to bake on the floor is a horror story waiting to happen. Proper containment and disposal are just as important as the change itself.
The Roll and Tuck
First, contain the mess within the diaper itself. Lay the dirty diaper flat, fold the front half up over the mess, and then use the sticky tabs to wrap it all up into a tight, neat little ball. The tabs should stick to the outside of the diaper, sealing everything inside. This simple step prevents any accidental smears as you handle it.
Your Disposal System Options
You need a way to lock down the odor until you can get to a real trash can.
- Scented Diaper Sacks: These are cheap, small, and effective. The light scent helps mask odors, and the plastic is thick enough to provide a reliable barrier. The tie-handles make them easy to seal securely.
- Dog Waste Bags: These are often even cheaper than diaper sacks and work just as well. They come on convenient rolls that are easy to stash in your caddy. Many are also biodegradable, which is a nice bonus.
- A Reusable ‘Wet/Dry’ Bag: For a more eco-friendly option, you can use a small wet/dry bag (the kind used for cloth diapers or wet swimsuits). They have a waterproof, odor-proof lining. Just place the rolled-up diaper inside, zip it shut, and then empty and wash the bag when you get home.
The ‘Quarantine Zone’
Once the diaper is sealed in its bag, you still need a place to put it. Designate a ‘quarantine zone’ in your car. This could be a specific pocket on the back of a seat or a small, hard-sided, lidded trash can that lives on the floor in the back. The goal is to keep it separate from everything else and to have a consistent spot for it so you never forget it’s there. A forgotten diaper is a very, very unpleasant surprise.
And whatever you do, please don’t be the person who leaves a dirty diaper on the ground in a parking lot. Your car kit makes it easy to be a good citizen. Pack it in, pack it out.
Hack #7: The Post-Change Cleanup Crew
The baby is clean, the dirty diaper is contained, but what about you and your car? A quick final cleanup ensures that everything is fresh and ready for the next adventure (or the next diaper).
Cleaning Your Hands
Even if you didn’t get anything on them, it’s best practice to clean your hands thoroughly after a diaper change. Since you don’t have a sink, hand sanitizer is your best friend. Use a generous amount and rub your hands together until they are completely dry. If you prefer, you can also use baby wipes to wipe down your hands first, followed by sanitizer, for an extra-clean feeling.
Wiping Down Your Gear
Take a moment to wipe down your reusable changing mat with a fresh wipe. Even if it looks clean, it’s a good habit to get into. This prevents any lingering germs from being folded up and put away. Let it air dry for a minute before you fold it if you can.
The Car ‘Freshen Up’
Despite your best efforts, sometimes odors can linger. Keep a car-friendly air freshener or a small spray bottle of fabric-safe deodorizer (like Febreze) in your glove compartment. A quick spritz after a particularly fragrant diaper change can make a world of difference. It’s a small step that makes getting back into the driver’s seat a much more pleasant experience.
Finally, do a quick visual scan of your ‘changing station’—whether it was the front seat or the trunk—to make sure no supplies were left behind. A stray wipe, a tube of cream, or a disposal bag can easily get lost. Putting everything back in your caddy right away means you’re instantly prepared for next time.
This whole post-change routine should only take about 30 seconds, but it’s the final step that separates the rookies from the pros. It leaves you, your baby, and your car feeling clean, fresh, and ready to hit the road again.
Conclusion
See? You’ve got this. Changing a diaper in the car goes from a frantic, dreaded task to a minor, manageable pit stop when you have the right strategy. By creating a dedicated car caddy, choosing your station wisely, and using a few of these clever hacks like the puppy pad shield and the one-handed wipe grab, you can handle anything that comes your way.
Remember to be kind to yourself. There will be messy changes. There will be times you forget to restock the wipes. It’s all part of the wild, beautiful journey of parenting. The goal isn’t perfection; it’s to feel prepared and confident. You are your baby’s safe place, and your calm, capable handling of these little challenges is what truly matters.
So, pack your caddy, hit the road, and enjoy the freedom of knowing that a diaper emergency is just another small bump in the road you are more than equipped to handle. Happy travels!