7 Deadly Car Seat Mistakes 90% of Parents Make (And How to Fix Them)
Hey there, amazing new parents. Welcome to the club! I know your world has been turned upside down in the most beautiful, exhausting way possible. You’re juggling feeding schedules, sleep deprivation, and a love so fierce it takes your breath away. Amidst all this, you’re also tasked with becoming an expert on a mountain of baby gear, and let’s be honest, the car seat can feel like the final boss of parenting puzzles.
My name is Sarah, and I’ve spent the last two decades as a pediatric nurse and lactation consultant. I’ve held countless new babies and, just as importantly, I’ve helped thousands of nervous parents just like you. I can tell you with 100% certainty: you are doing a great job. I can also tell you that car seat mistakes are incredibly common—so common, in fact, that studies show up to 90% of car seats are used incorrectly. The thing is, these aren’t just little slip-ups; they can have serious consequences.
But please, don’t let that statistic scare you. Let it empower you. This guide isn’t here to judge or shame. It’s a warm, friendly chat from me to you, designed to turn confusion into confidence. We’re going to walk through the seven most common—and most critical—car seat mistakes I see every day. For each one, I’ll explain why it’s a risk and give you a simple, easy-to-remember fix. Let’s get your precious cargo buckled in safely, so you can have one less thing to worry about. You’ve got this!
Mistake #1: The Car Seat is Too Loose in Your Vehicle
Why It’s a Problem
This is, without a doubt, the number one mistake I see. You’ve bought a top-of-the-line car seat, but if it’s not installed tightly in your vehicle, it can’t do its job. In a crash, a loose car seat can move several inches or even fly forward, dramatically increasing the risk of injury. The car seat should act as one with your car, absorbing the impact and protecting your baby.
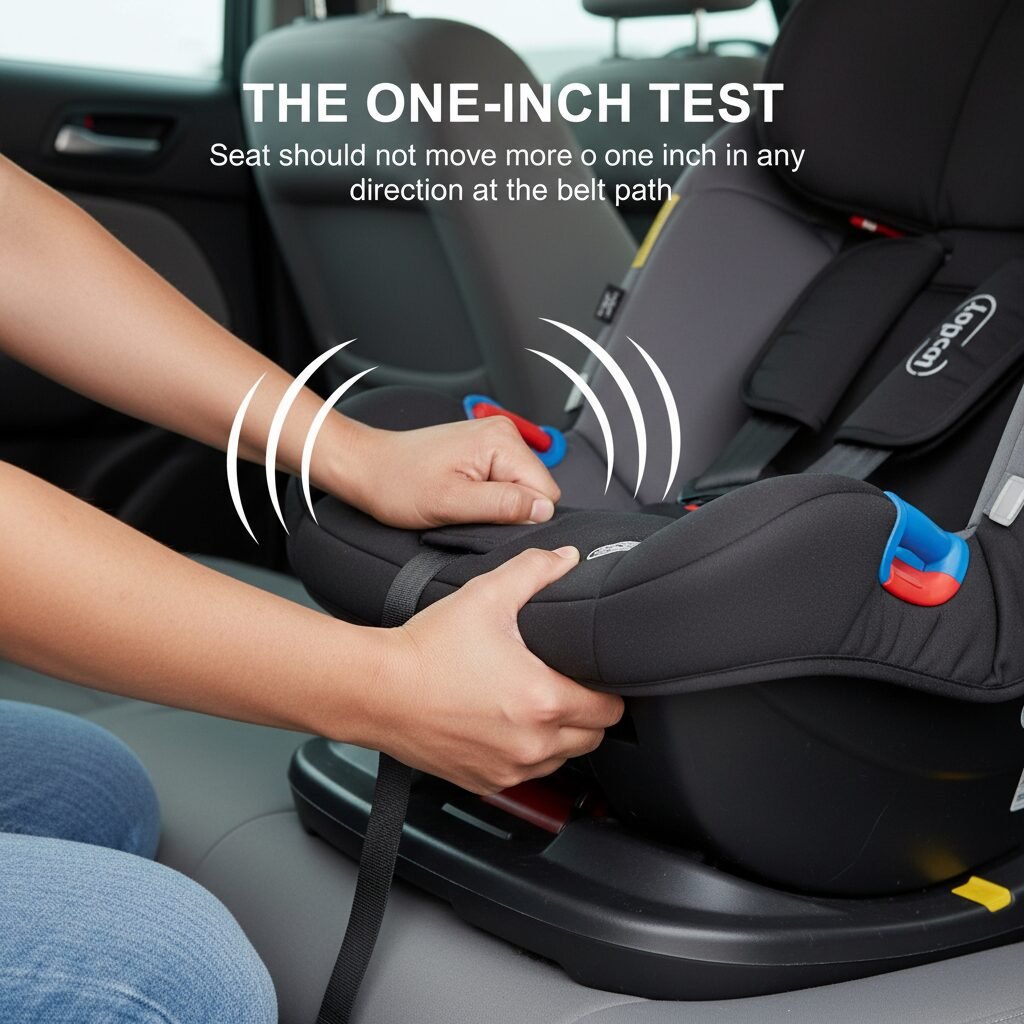
How to Fix It: The One-Inch Test
This is your new best friend. It’s a simple, foolproof way to check your installation every single time you put the seat in the car.
- Grip the Seat: Grab the car seat base (or the belt path if you’re installing without a base) with your non-dominant hand. That’s the path where the vehicle seatbelt or LATCH strap goes through.
- Tug It: Give it a firm tug from side-to-side and front-to-back. Don’t be shy!
- Check for Movement: The car seat should not move more than one inch in any direction. If it does, it’s too loose.
To get a tighter install, you often need to use your body weight. Put your knee in the car seat and press down firmly while you pull the seatbelt or LATCH strap tight. You want to remove all the slack. Once it’s tight, lock the seatbelt (check your vehicle manual for how to do this—most newer cars lock automatically when you pull the belt all the way out). Then, perform the one-inch test again. It’s a little bit of a workout, but that secure feeling is worth every bit of effort!
Safety Tip: Always check your vehicle’s manual and your car seat’s manual to understand the proper installation method. They are your ultimate guides!
Mistake #2: The Harness Straps are at the Wrong Height
Why It’s a Problem
Those shoulder straps aren’t just there to hold your baby in; their position is critical for protecting the spine and preventing your baby from moving dangerously in a crash. The correct height depends entirely on whether your child is rear-facing or forward-facing.
How to Fix It: The Shoulder Rule
This is another easy one to remember. Just think about the direction your baby is facing.
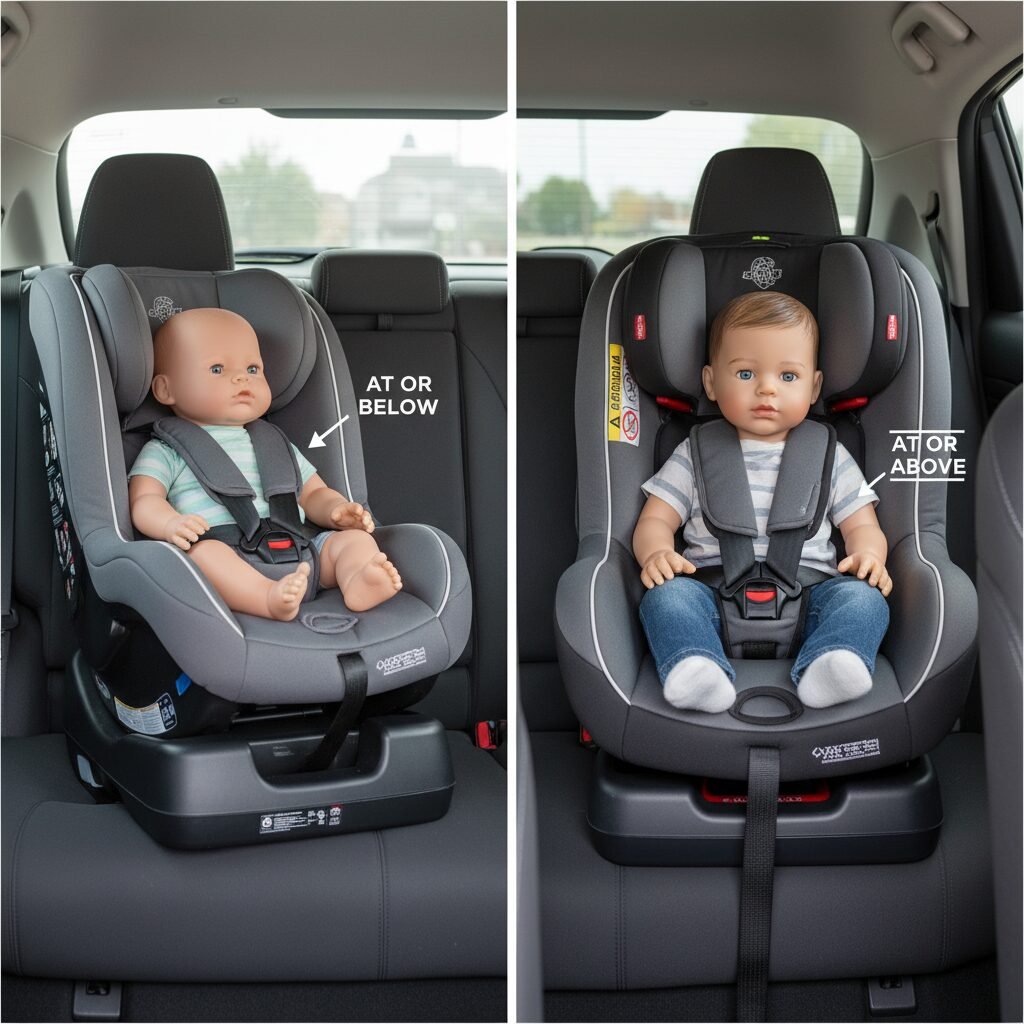
- For Rear-Facing Seats: The harness straps must come from a slot that is at or just below your baby’s shoulders. In a frontal crash (the most common type), this positioning helps cradle your baby and keep their body from sliding upwards in the seat. If the straps are too high, their little body can launch upward, putting immense pressure on their neck and spine.
- For Forward-Facing Seats (for older toddlers): The harness straps must come from a slot that is at or just above your child’s shoulders. This helps keep their torso securely against the back of the seat during a collision.
Most car seats today have a no-rethread harness, which means you can adjust the height just by squeezing a handle and pulling the headrest up or down. If you have a seat that requires rethreading, it’s a bit more work, but it’s absolutely crucial to get it right. Take the time to make the adjustment as your baby grows—it can change faster than you think!
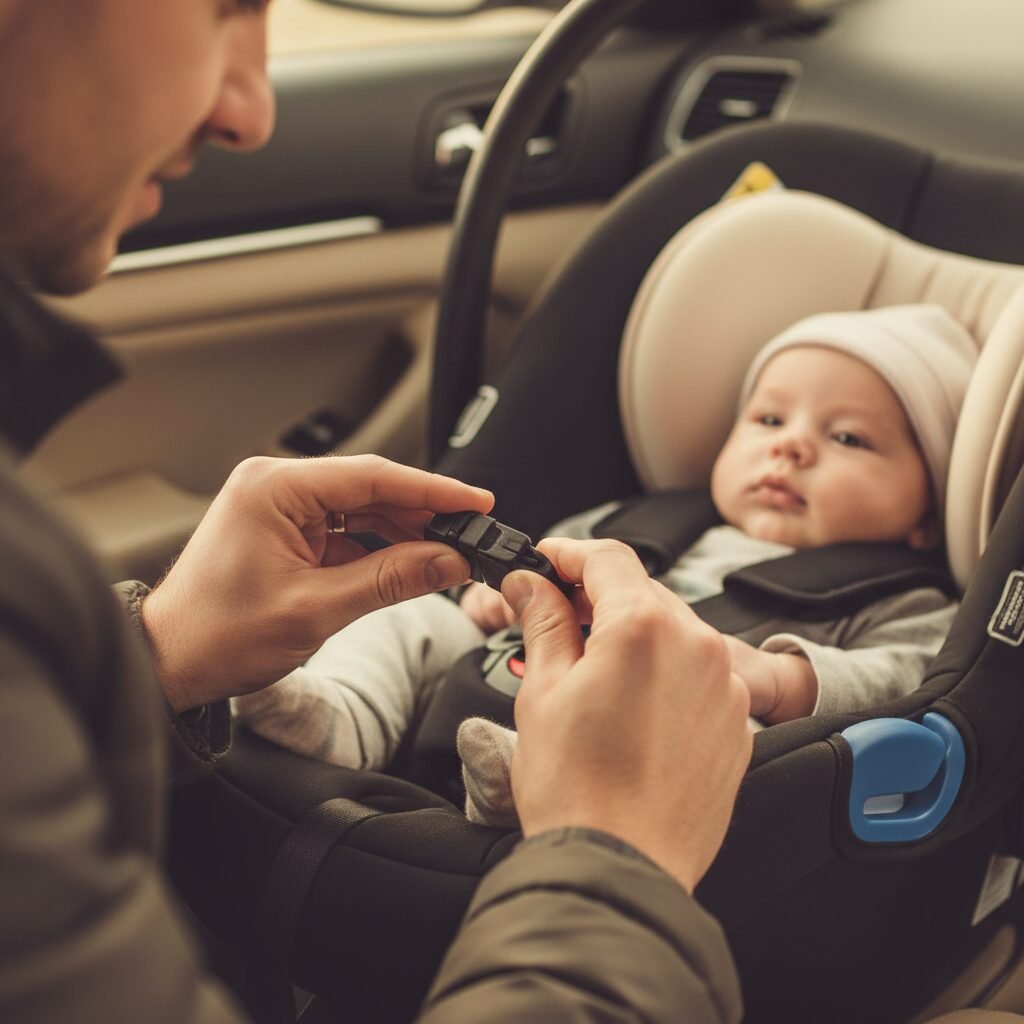
Mistake #3: The Harness is Too Loose on the Baby
Why It’s a Problem
You’ve installed the seat tightly and set the strap height, but if the harness itself is loose, your baby isn’t secure. In an accident, a loose harness can allow a baby to be thrown against the straps, or worse, be ejected from the seat entirely. We often worry about making our babies uncomfortable, so we leave the straps a little loose. But a snug harness is a safe harness.
How to Fix It: The Pinch Test
This is a non-negotiable step every single time you buckle your child in. It takes two seconds and could save their life.
- Buckle Up: Secure the chest clip and buckle.
- Tighten the Straps: Pull the single strap (usually located near your baby’s feet) to tighten the harness system until it looks snug.
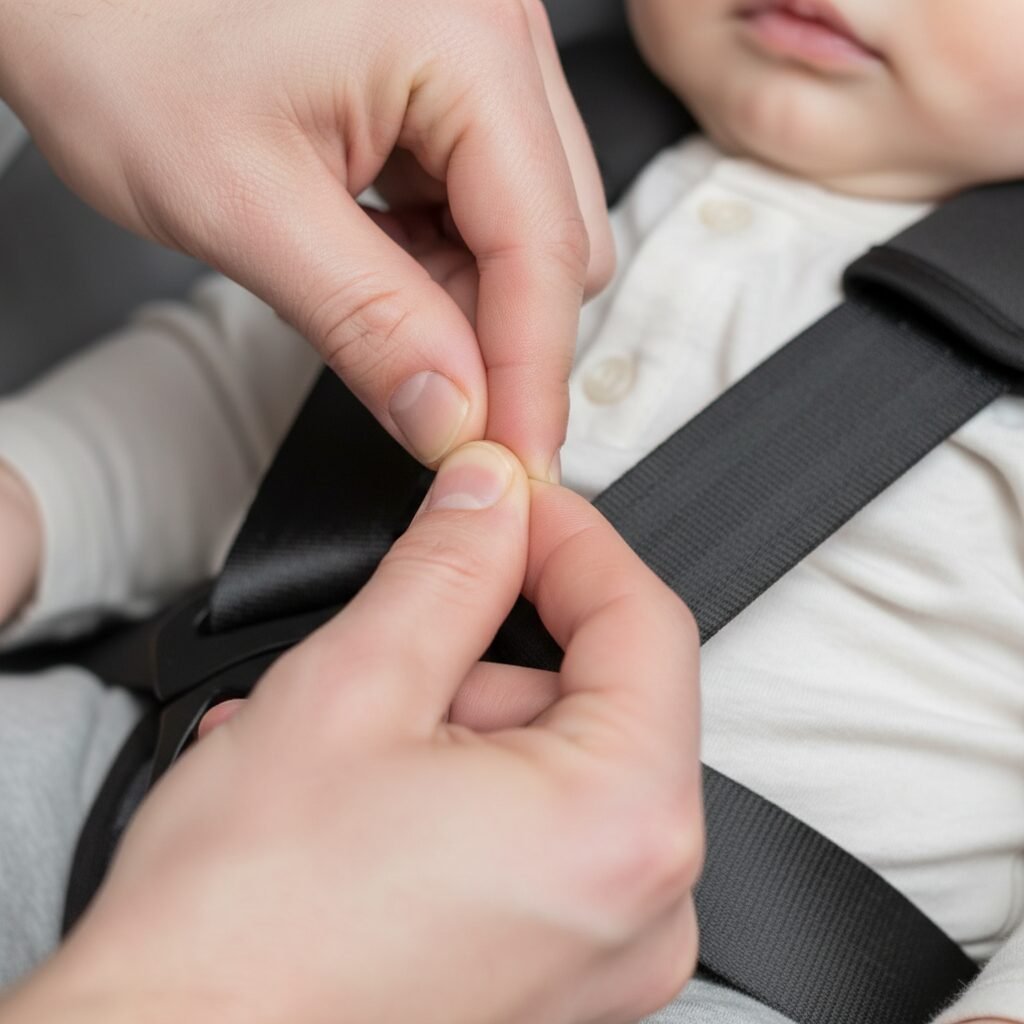
- Perform the Pinch Test: Using your thumb and forefinger, try to pinch a horizontal fold of webbing at your baby’s collarbone.
If you can pinch some of the strap, it’s too loose. You need to tighten it more until your fingers just slide off the webbing. You’ll be surprised how snug it needs to be, but rest assured, your baby can breathe just fine. A properly tightened harness is the most critical part of the whole system.
A Nurse’s Advice: Don’t be afraid to make it snug! The car seat is designed to distribute crash forces safely, but it can only do that if the harness is holding your baby firmly in the correct position.
Mistake #4: The Chest Clip is in the Wrong Position
Why It’s a Problem
Ah, the chest clip. It seems like such a small piece of plastic, but its job is huge. Its one and only purpose is to keep the harness straps properly positioned over your baby’s strong, bony shoulders. If the clip is too low (down on the belly) or too high (up on the neck), the straps can easily slip off the shoulders during a crash. If that happens, your baby’s upper body is no longer restrained and they could be ejected from the seat.
How to Fix It: The Armpit Rule
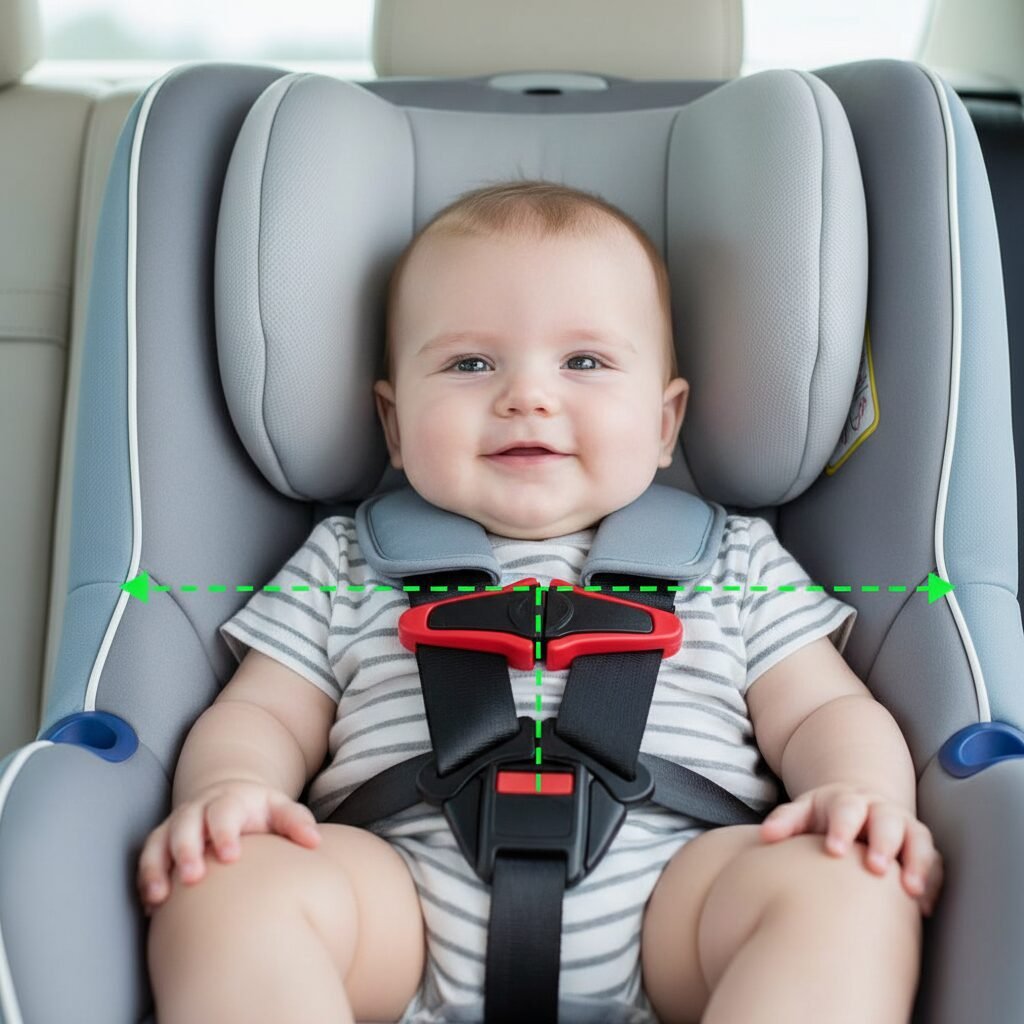
This is another beautifully simple rule to remember: The top of the chest clip should be even with your baby’s armpits.
That’s it! After you’ve done the Pinch Test to ensure the harness is snug, just slide that little clip up until it’s at armpit level. A clip on the belly allows the straps to fall off the shoulders. A clip on the neck is, of course, a choking hazard. Armpit level is the sweet spot that keeps everything exactly where it’s supposed to be.
Mistake #5: Using Bulky Clothing or Aftermarket Products
Why It’s a Problem
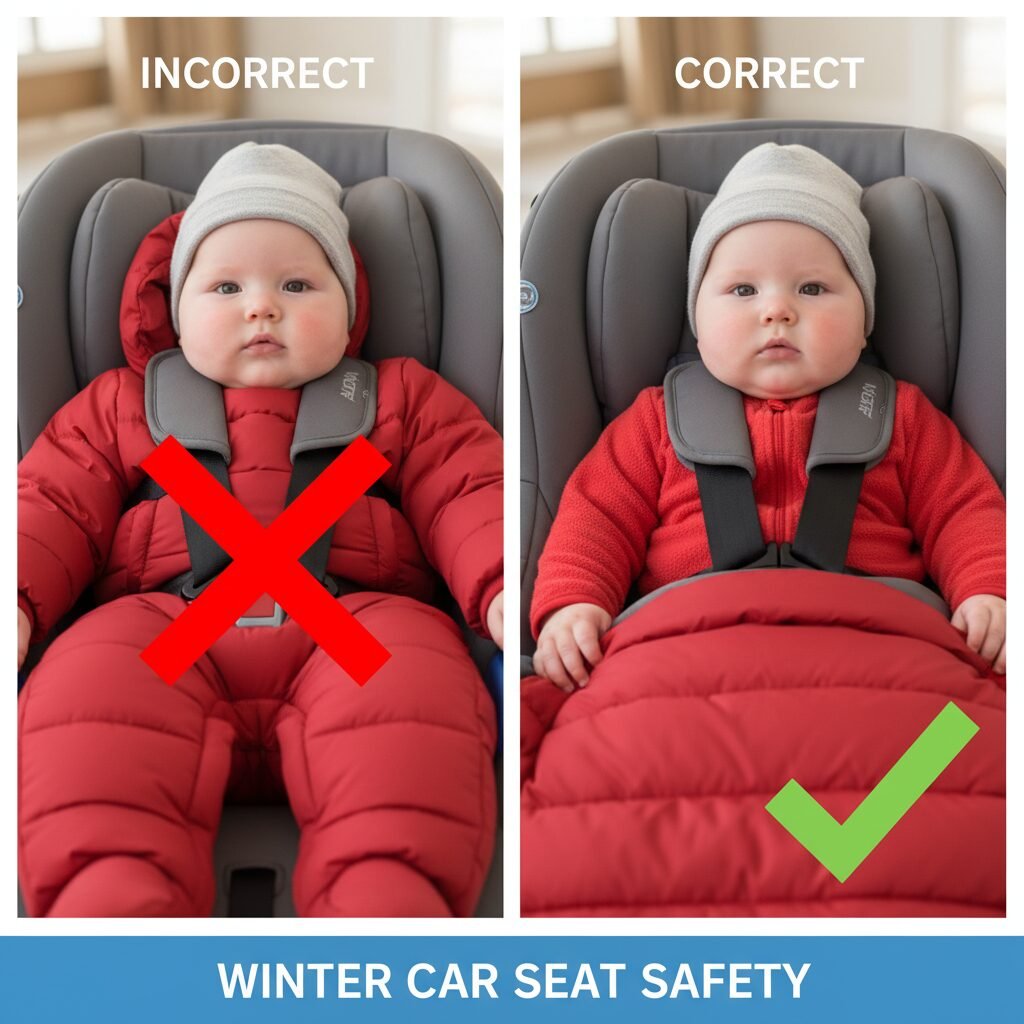
When it gets cold, our first instinct is to bundle our babies up in puffy snowsuits or thick coats before putting them in the car. This is one of the most dangerous hidden mistakes. In a crash, the force is so strong that all the fluffy padding in a coat instantly compresses, creating a huge gap between your baby and the harness. The harness is now dangerously loose, leading to the same risks of ejection we’ve already talked about.
The same goes for most aftermarket products—things not made by your car seat manufacturer, like strap covers, head inserts, or bunting bags that go behind the baby. These were not crash-tested with your seat and can interfere with its performance.
How to Fix It: Thin Layers and Blankets
Keeping your baby warm and safe is easy with a few simple adjustments.
- Dress in Thin Layers: Dress your baby in thin, close-fitting layers like fleece pajamas or a lightweight fleece jacket. Multiple thin layers are warmer than one bulky one.
- Buckle First, Then Cover: Place your baby in the car seat without their coat. Buckle them in and perform the Pinch Test to ensure the harness is snug against their body.
- Add Warmth on Top: Once they are safely buckled, you can put their coat on them backwards over their arms or simply lay a thick, cozy blanket over them, tucking it in securely over the harness. They’ll be just as warm, but infinitely safer.
Safety Warning: If it didn’t come in the box with your car seat, it hasn’t been proven safe to use with your car seat. Stick to the manufacturer’s approved accessories.
Mistake #6: Turning Your Child Forward-Facing Too Soon
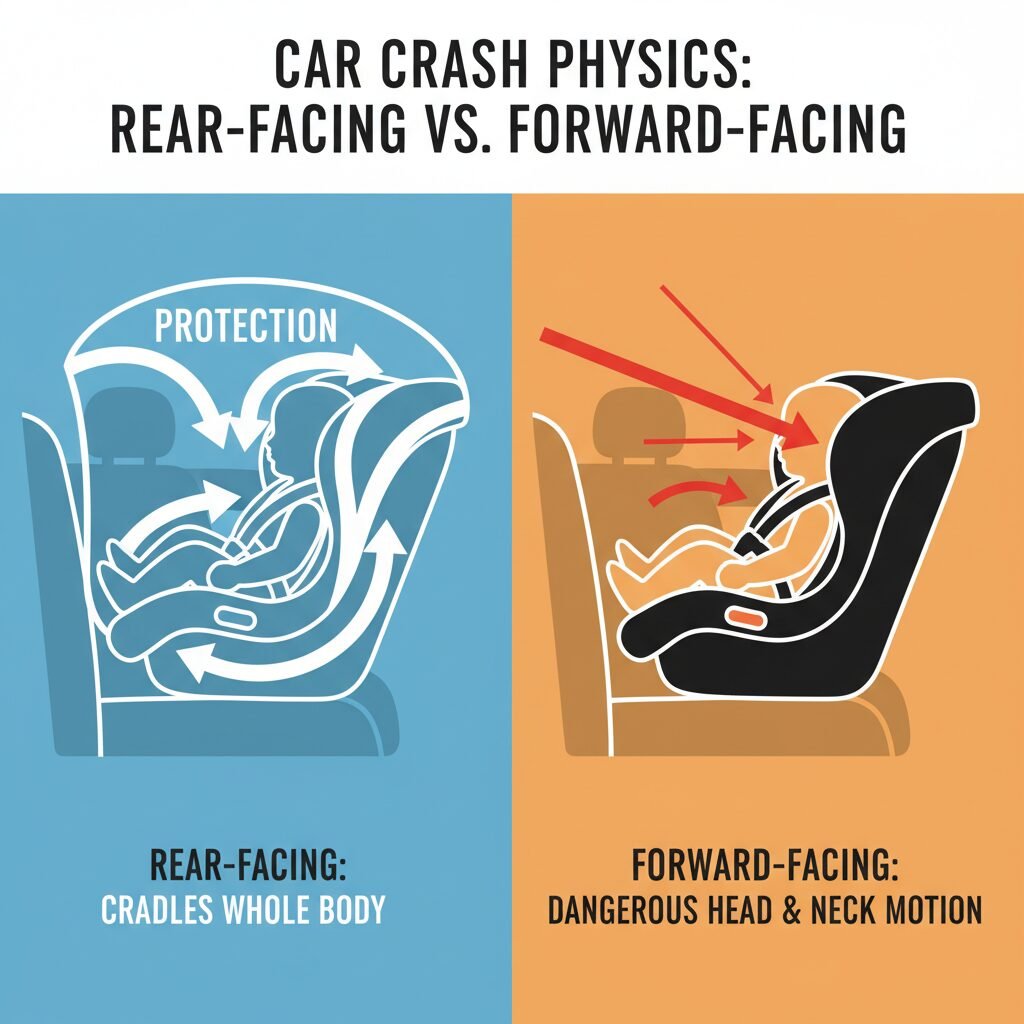
Why It’s a Problem
I know how tempting it is. Your toddler’s legs look scrunched, you want to see their face in the rearview mirror, and you’ve heard that one year is the milestone. But turning a child forward-facing before they are ready is one of the most significant risks you can take. A young child’s body is still developing. Their vertebrae are soft cartilage, and their head is disproportionately large and heavy. When rear-facing, a crash cradles their head, neck, and spine, distributing the forces evenly across the strong shell of the car seat. When forward-facing, their body is held back by the harness, but their heavy head is thrown forward with incredible force, which can stretch the spinal cord to the point of catastrophic injury.
How to Fix It: Follow the Experts and Max Out the Limits
The American Academy of Pediatrics (AAP) and the National Highway Traffic Safety Administration (NHTSA) are unanimous on this: Keep your child rear-facing for as long as possible, until they reach the maximum height or weight limit for their car seat.
For virtually all children, this means staying rear-facing until at least age two, and for most, it’s closer to age four! Don’t worry about their legs being bent; it’s perfectly safe and comfortable for them. They don’t know any different! Leg injuries in rear-facing children are extremely rare, while head and spinal injuries are the most severe. Let them outgrow the rear-facing limits of their seat before you even consider turning them around.
Mistake #7: Not Reading the Manuals (Both of Them!)
Why It’s a Problem
I get it. You’ve just assembled a crib, a swing, and a changing table. The last thing you want to do is sit down and read two dense, technical manuals. But every single car seat and every single vehicle is different. There are unique rules for where you can install a car seat in your car (never the front seat!), how to use the LATCH system, and how to lock your specific seatbelts. The car seat manual contains the non-negotiable rules for that seat’s use, including its expiration date (yes, they expire!).
How to Fix It: Your 30-Minute Safety Investment
Think of this as a crucial 30-minute investment in your child’s life. Grab a cup of coffee (or tea, you do you!), and sit down with both manuals before you even attempt the first installation.
- The Car Seat Manual: Read it cover to cover. Learn how to adjust the harness, how to clean it, and most importantly, what the height and weight limits are for each mode of use. Keep it in a safe place, like taped to the back of the car seat itself.
- The Vehicle Manual: Look for the ‘Child Restraints’ section. This will show you the dedicated LATCH anchor points and tell you how to properly lock your seatbelts for a car seat installation. It will save you so much guesswork.
Reading these isn’t about being perfect; it’s about being informed. You bought that specific seat for its safety features—the manuals are the key to unlocking them.
Conclusion
You Are Now a Car Seat Safety Pro!
Take a deep breath. You did it! We’ve covered a lot of ground, but I hope you feel more confident and empowered, not overwhelmed. Remember, nobody is born knowing this stuff. It’s a skill you learn, just like swaddling or changing a diaper. These seven mistakes are common because car seats can be complicated, but the fixes are simple once you know what to look for.
Bookmark this page. Come back to it. Do a quick check of the ‘One-Inch Test’ and the ‘Pinch Test’ every so often. Your child’s safety is a journey, not a one-time setup. And if you ever feel unsure, please, please seek out a certified Child Passenger Safety Technician (CPST). They are trained experts (often for free!) who can check your installation and teach you how to use your seat correctly. You can find one near you through organizations like Safe Kids Worldwide.
You are your child’s greatest protector, and by taking the time to read this, you’ve already proven that. Be proud of that. Now go enjoy the ride, knowing your most precious passenger is as safe as can be.